Configuring and Managing Repositories in Cloudback
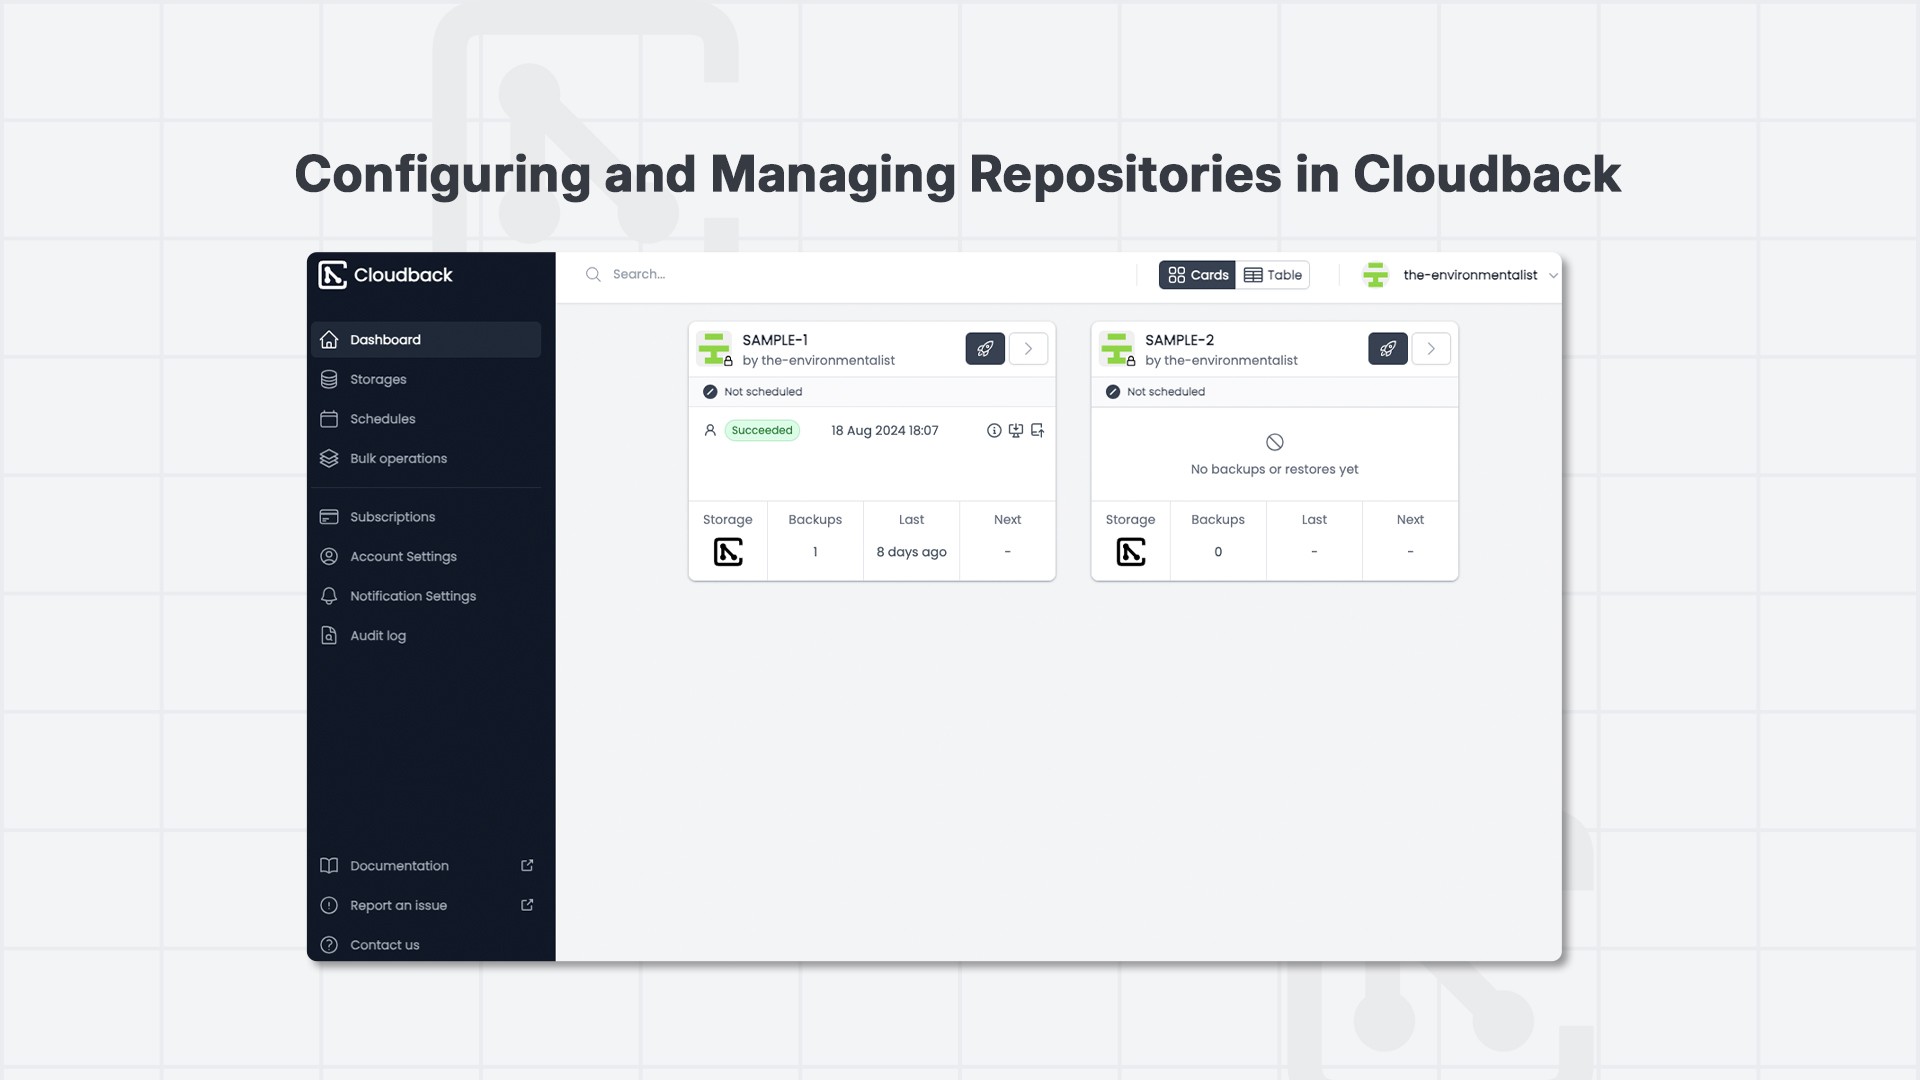
Managing your repositories with Cloudback is a breeze. Once you’ve set up the application, you have two convenient ways to view and manage your repositories from the Cloudback Dashboard:
1. Card Format
What It Shows: Get a quick snapshot of each repository with details like last backup, scheduling status, next backup, and storage selected, all displayed in a card format.
Features:
Quick Actions: Instantly download or restore backups with a single click. Backup and restore at lightning speed!
Trigger Backup: Start a new backup by clicking the rocket icon.
Best For: A visual summary that helps you easily monitor and manage your repositories.
2. Table Format
What It Shows: A detailed table view that’s perfect for managing and organizing a large number of repositories.
Features:
Checklist Selection: Select multiple repositories for bulk actions.
Detailed View: Click on the "Details" option to access in-depth information about each repository.
Best For: Managing multiple repositories efficiently and getting a detailed overview.
Viewing Repository Details
To dive deeper into any repository, click the "Details" button. This will bring you to a detailed view with various settings and statistics:
Overview Tab
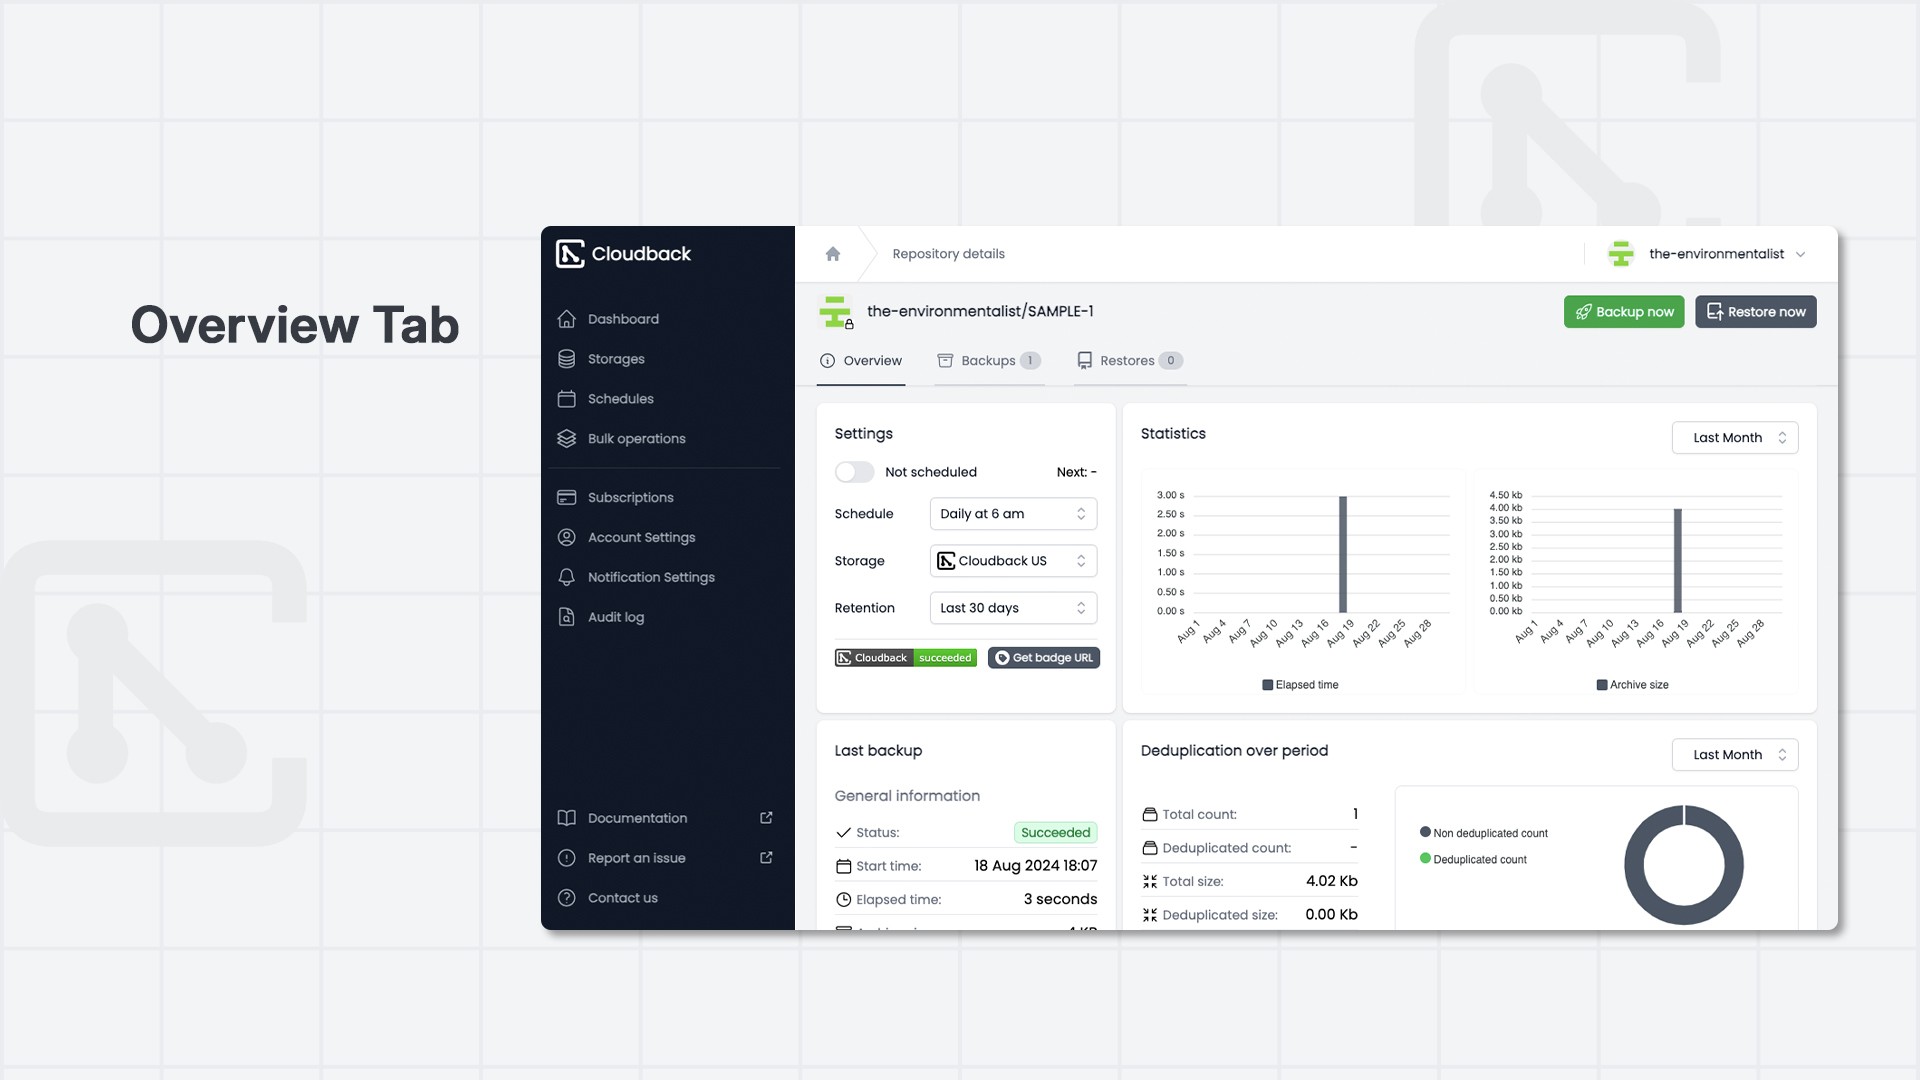
Settings:
Configure automatic backup schedules.
Choose your storage location (e.g., Cloudback US).
Set the retention period (e.g., Last 30 days). You have the option to customize the duration for which your backups are stored before they are permanently deleted. We provide several predefined options designed to meet the needs of most use cases. So you can customize your backup settings to fit your needs perfectly!
Statistics:
View graphs showing elapsed time and archive size over a selected period (e.g., last month).
Get insights into your backup performance.
Last Backup:
See information about your most recent backup, including status, start time, elapsed time, archive size, and whether deduplication was used.
Deduplication Over Period:
Review data on deduplication, including total count, deduplicated count, and the size saved.
Backups and Restores Tabs
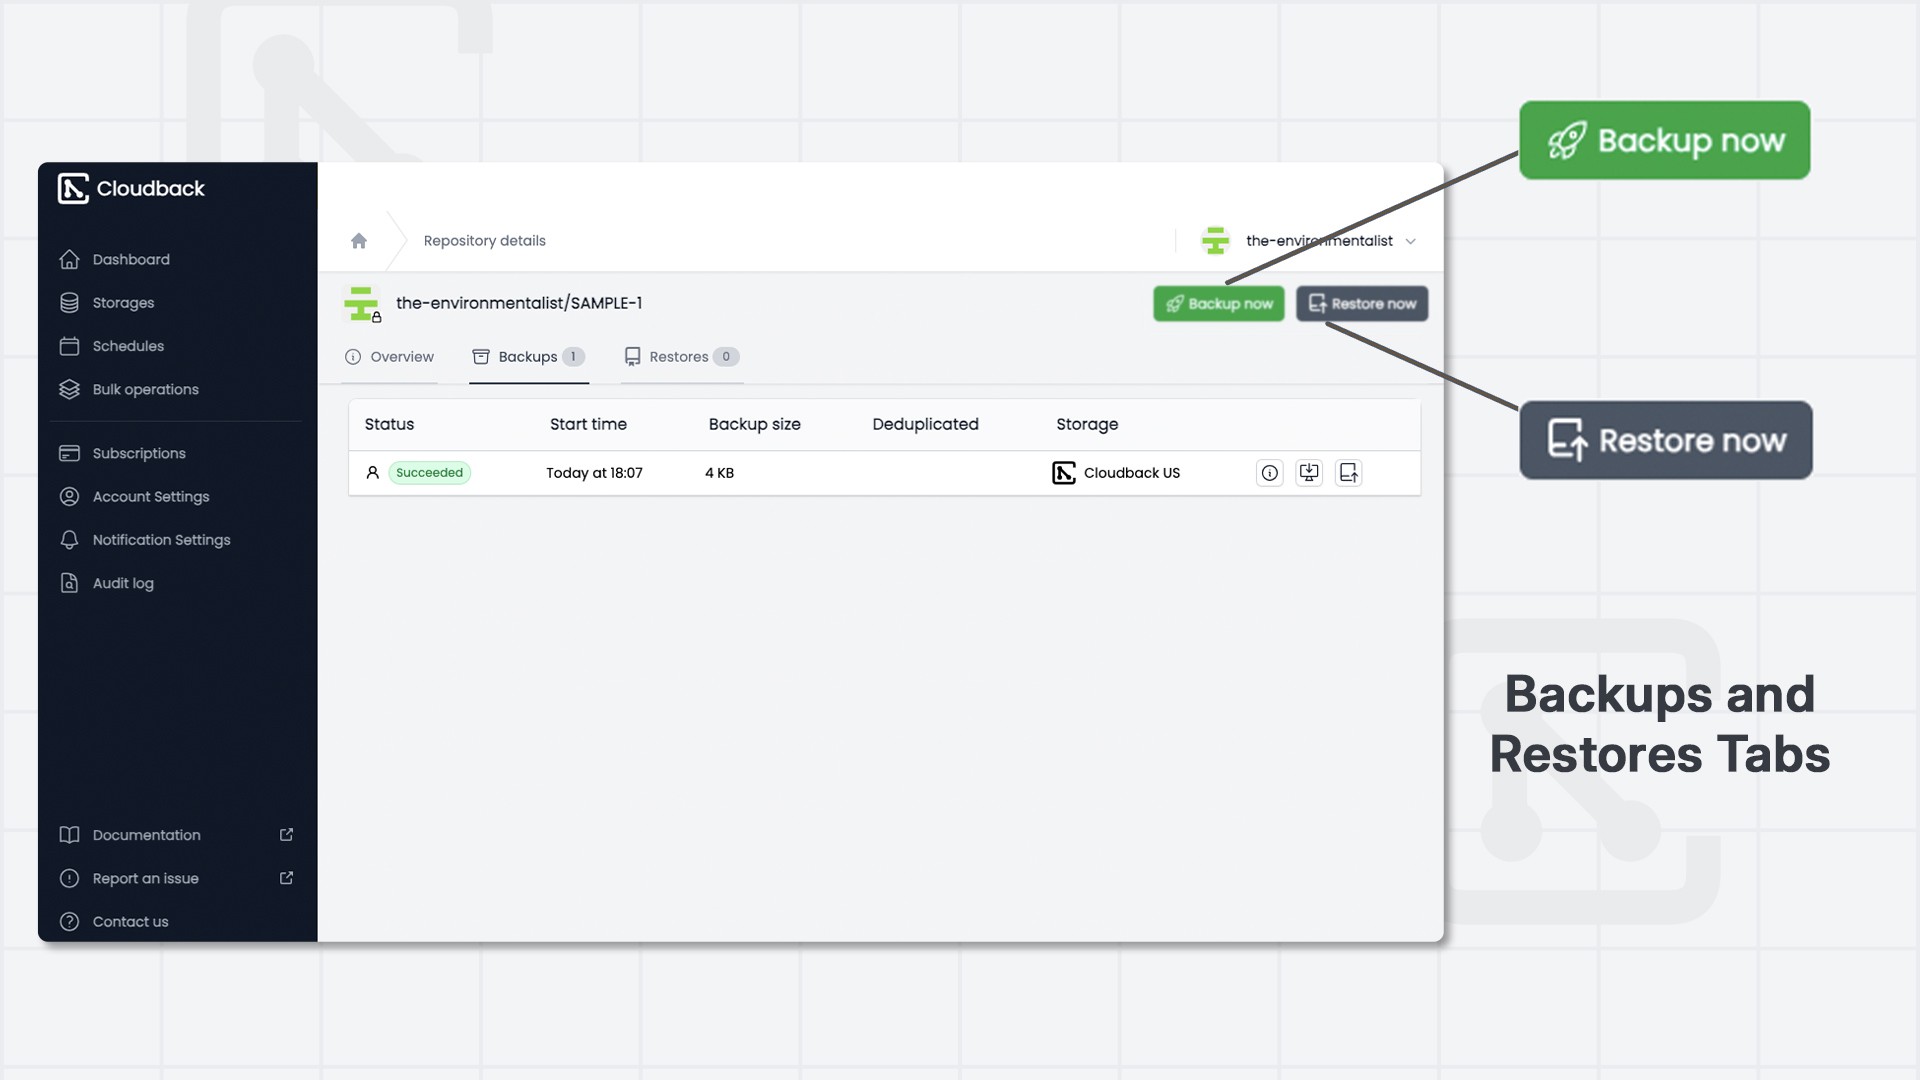
Backups:
View and manage past backups with details like status, start time, elapsed time, archive size, and more.
Download or restore backups with a single click.
Restores:
Access details of restored data from previous backups.
Install the Cloudback Restore App in your GitHub account and grant "All Repositories" access to continue the restore process.
Setting Up Storage
Cloudback makes it easy to choose and configure your storage to keep your backups safe and secure.
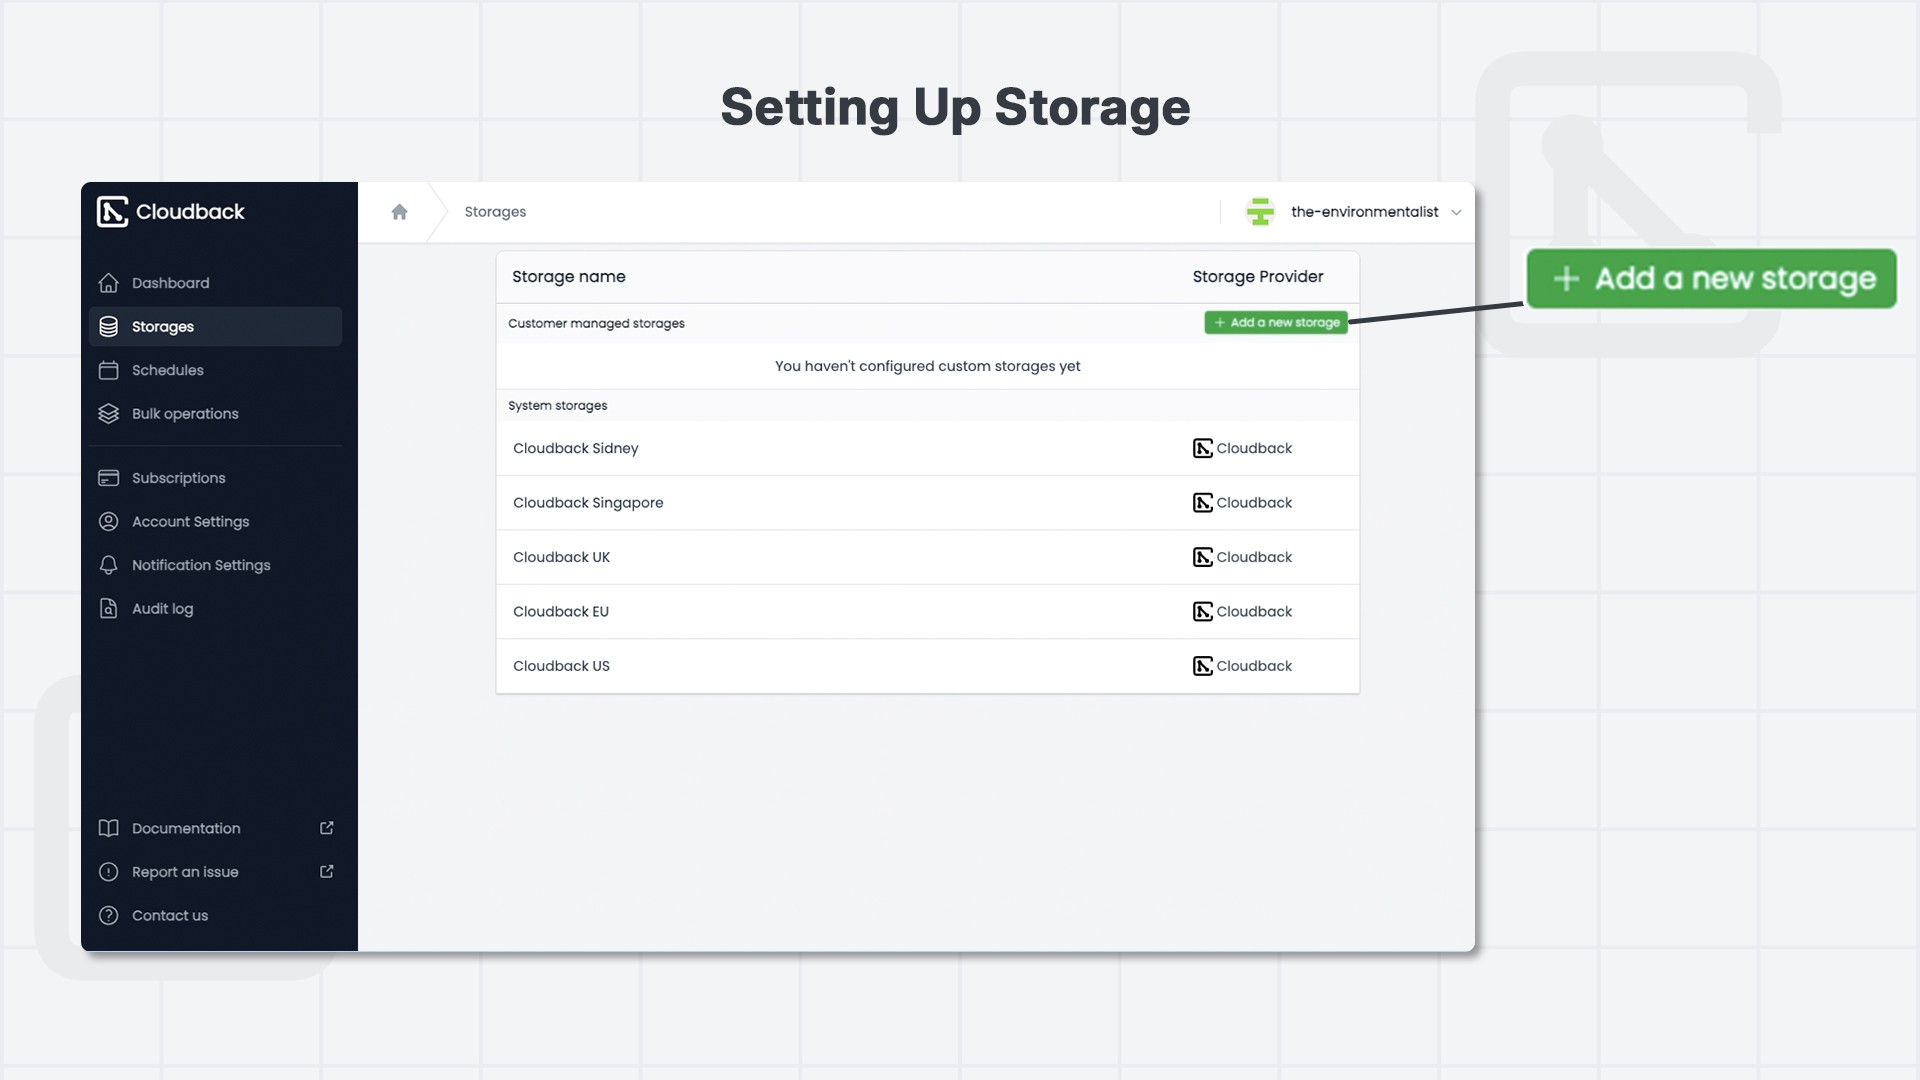
On the Cloudback Dashboard, click on “Storages” in the left-hand menu. You’ll be taken to the storage management screen, where you’ll see a list of available storage providers. This includes Customer Managed Storages and System Storages.
Let’s take a look at your options in detail.
1. Cloudback Managed Storages
Cloudback offers a range of managed storages located in different regions to comply with data residency regulations. You can choose the storage nearest to you at no extra cost. By default, all backups are stored in Cloudback US storage.
Available Cloudback Managed Storages:
Cloudback US - USA East, N. Virginia
Cloudback EU - EU Central, Amsterdam
Cloudback UK - EU West, London
Cloudback Sidney - Asia, Australia, Sidney
Cloudback Singapore - Asia, Singapore
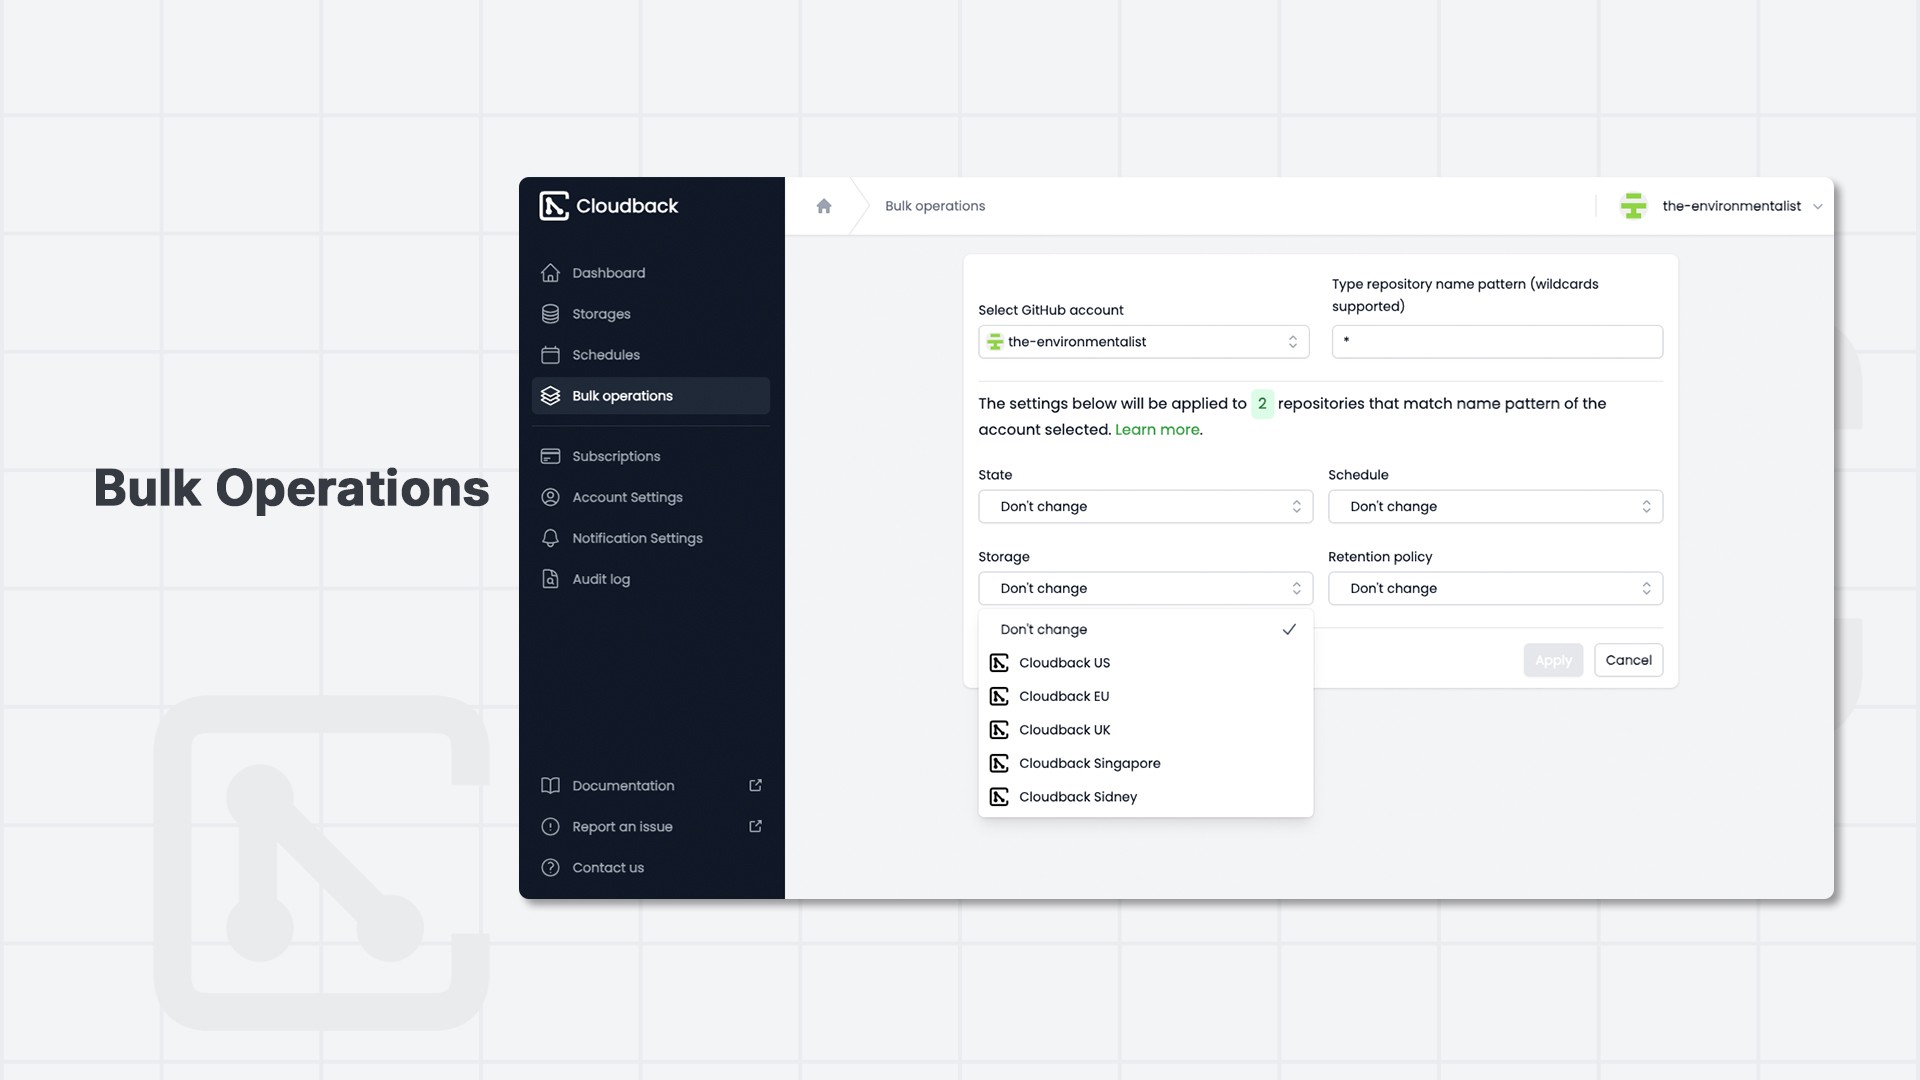
You will be able to select any of these storages from the Repository Overview dialog or via the Bulk Operations menu.
2. Customer Managed Storages
Would you prefer using your own storage? No worries—Cloudback allows you to store backups in your own storage. We ensure that no data is kept on our servers. Here’s how it works:
Backup Creation: Cloudback creates a backup of your repository.
Storage Transfer: The backup archive is transferred to your chosen storage.
Data Deletion: The archive is permanently deleted from Cloudback servers, ensuring no copies are retained by us.
Supported Storage Providers
Microsoft Azure Blob Storage
Microsoft OneDrive Personal
Microsoft OneDrive For Business
Amazon S3 Bucket (via Access Point or Access Key)
Amazon S3 Glacier
Google Cloud Storage Bucket
Alibaba Cloud Object Storage Service
OpenStack Swift Container (via S3 API)
Wasabi Bucket (S3 API)
If you want to add your own storage from the above providers, here’s how to do it:
1. Adding New Storage
Open the Storage Configuration Panel:
Click on “Add a new storage” to start setting up.
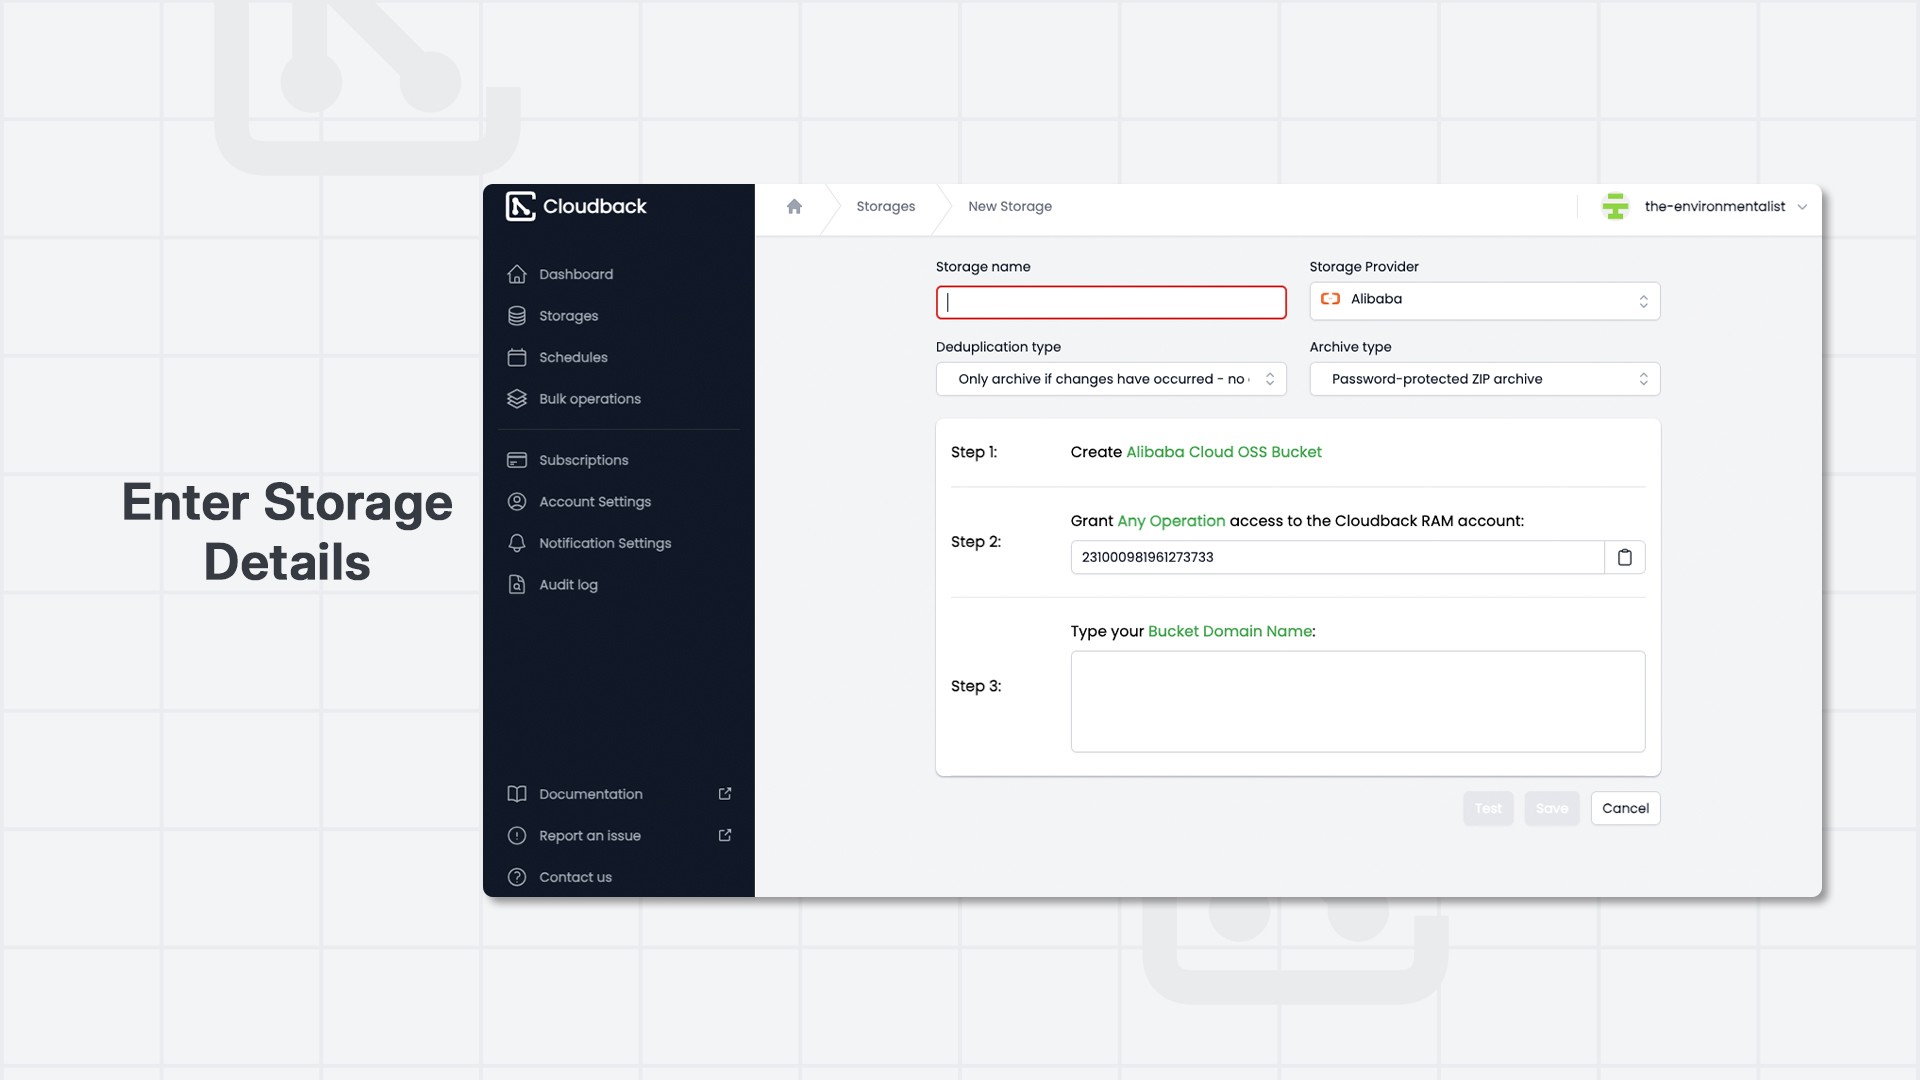
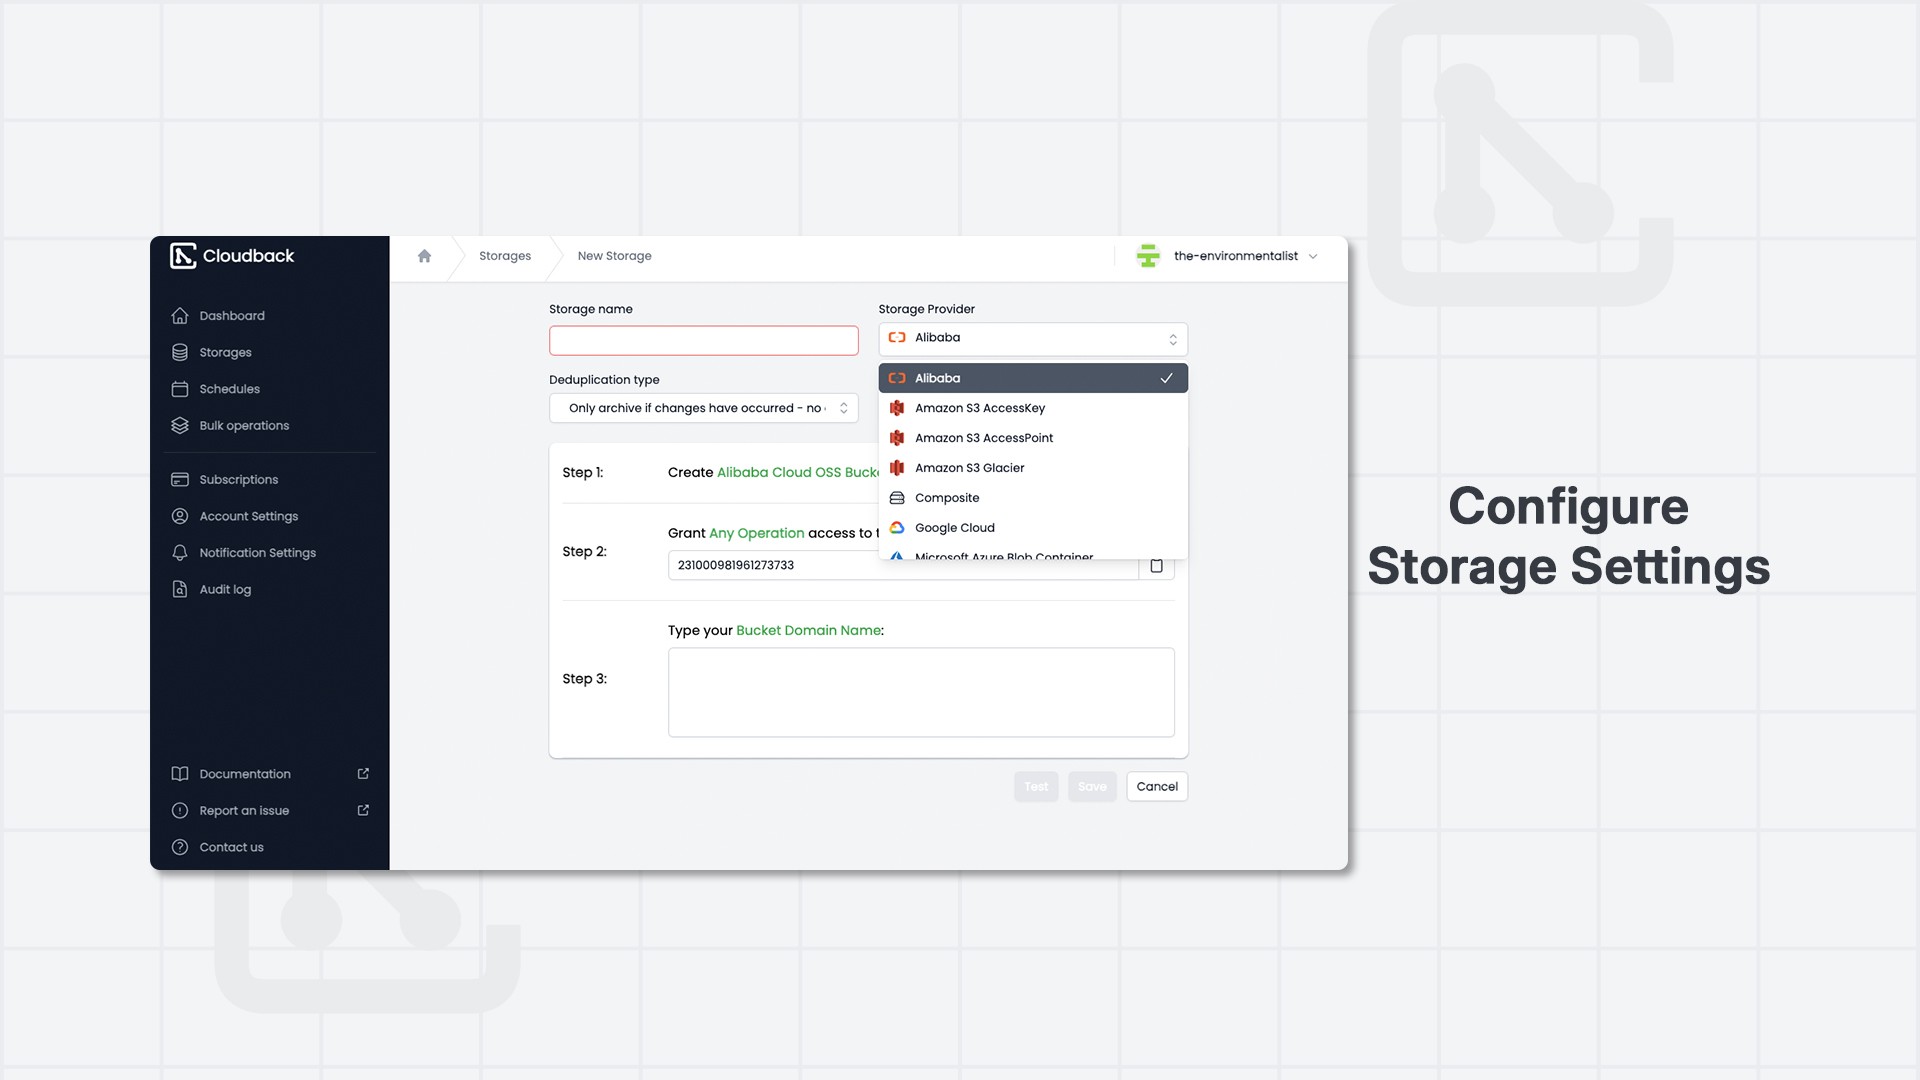
2. Enter Storage Details
Storage Name: Provide a name for your new storage.
Storage Provider: Choose from options like Alibaba, Amazon S3, Google Cloud, Microsoft Azure Blob Container, and more.
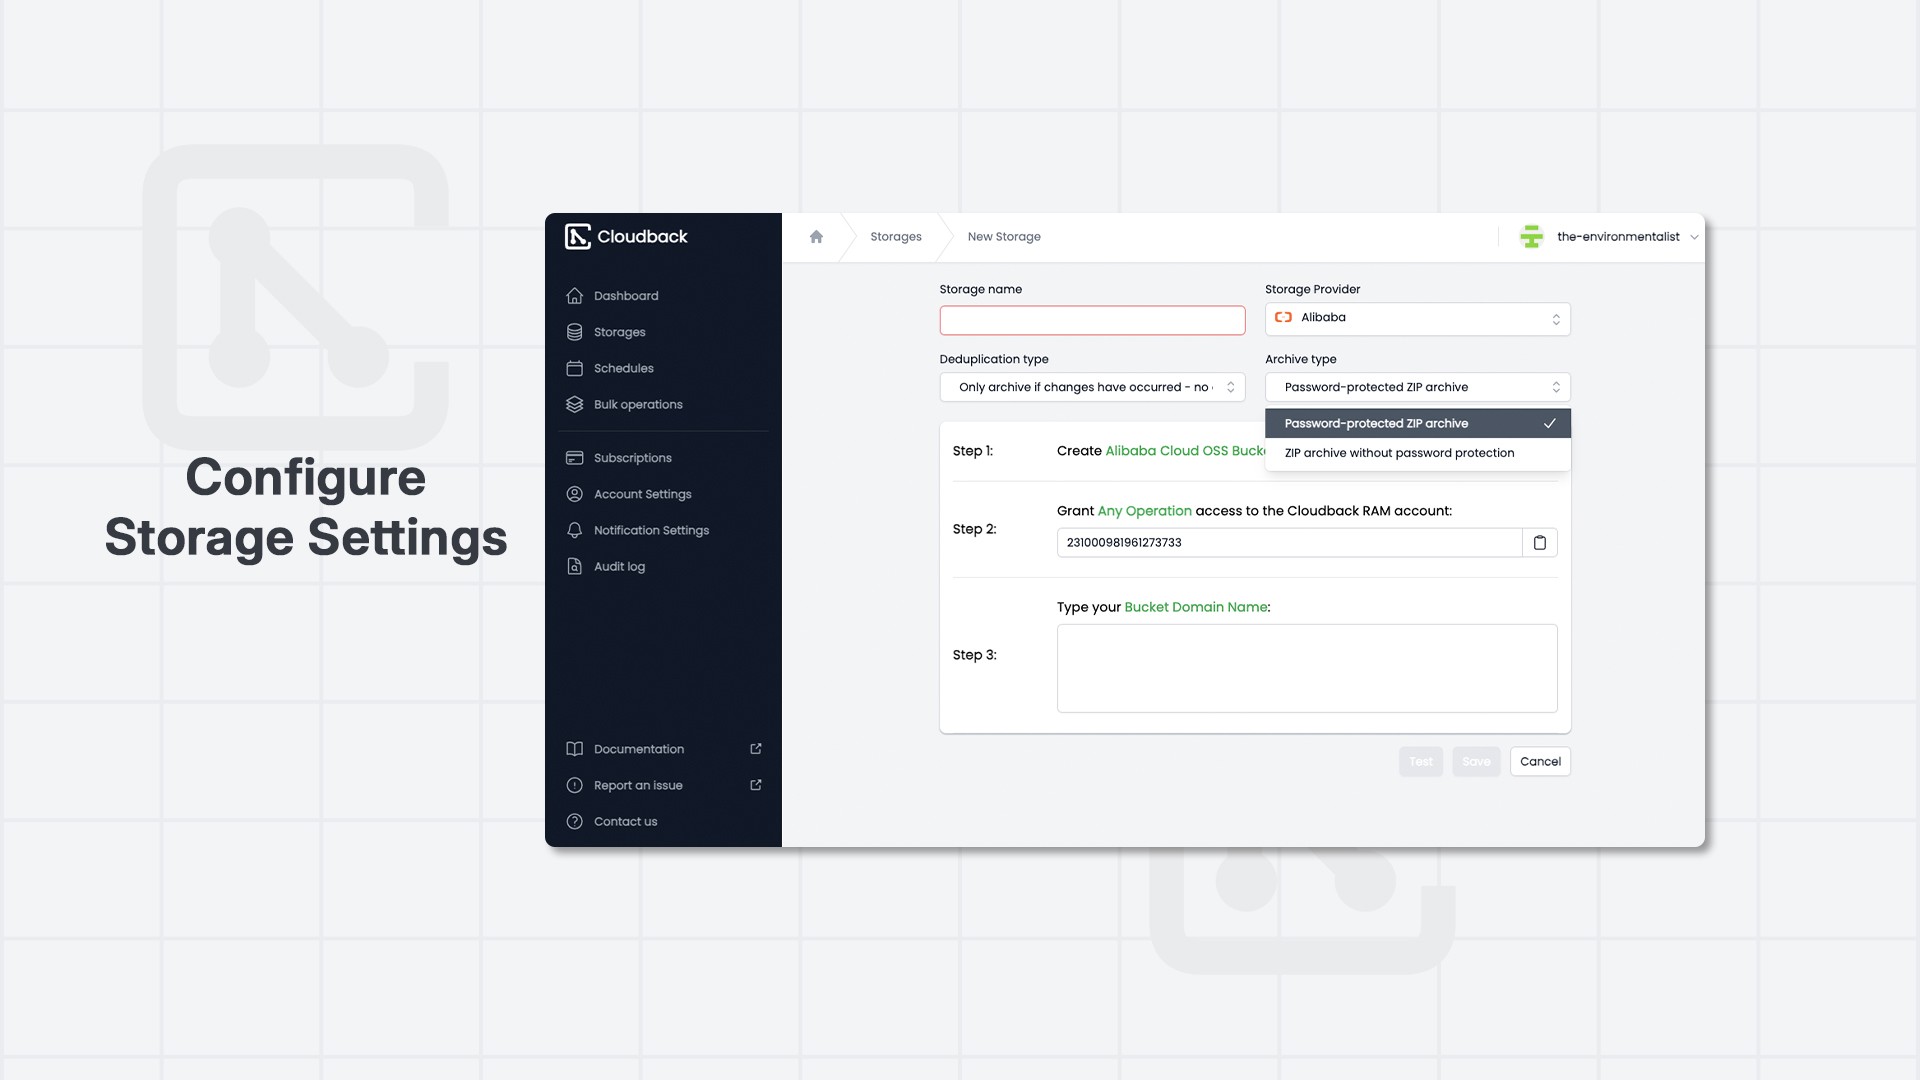
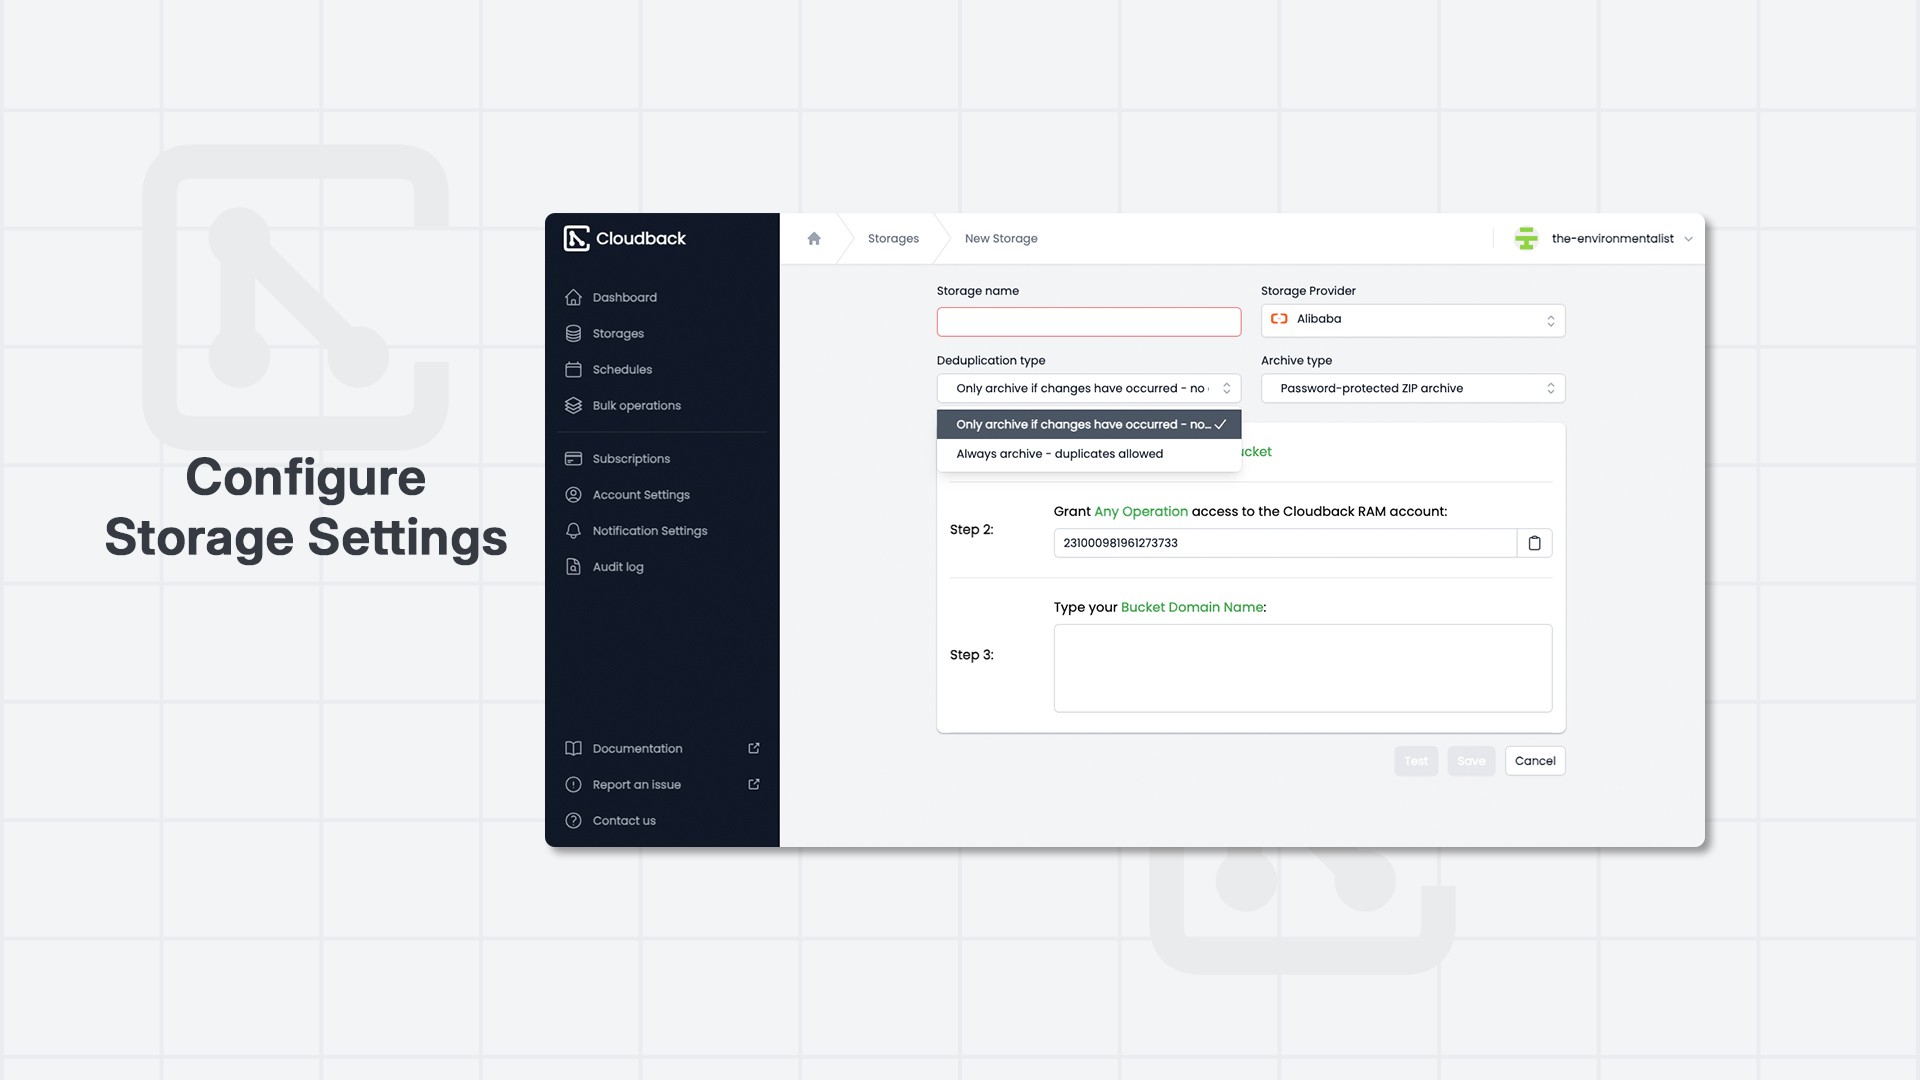
3. Configure Storage Settings
Deduplication Type: Choose to archive only when changes occur or always archive (including duplicates). Deduplication reduces storage size by eliminating duplicate data.
Archive Type: Select between a password-protected ZIP archive or a standard ZIP archive. Adding a password enhances security.
4. Provider-Specific Setup
Follow the specific steps for your chosen provider. For example, with Alibaba:
Create an Alibaba Cloud OSS Bucket.
Grant Access: Provide “Any Operation” access to Cloudback RAM by entering the account number.
Enter Bucket Domain Name: Input your Bucket Domain Name.
Click “Test” to verify the connection, “Save” to store your settings, or “Cancel” to exit.
5. Save and Manage
After saving, your storage will appear under your options in Cloudback.
Manage and adjust settings anytime from the “Storages” section of the dashboard.
Once your storage is registered, you can assign it to your repositories via the Repository Overview dialog or the Bulk Operations menu.
Notes
Need more storage options? We’re continuously expanding our supported storage providers. If you have a specific storage solution in mind, let us know or submit a feature request. We're here to help you secure your data in the way that works best for you!
What’s uploaded to your storage? We upload password-protected ZIP archives, with encryption passwords securely stored on our end. Even if someone gains unauthorized access, they'll only find encrypted archives—safe and secure.
Setting Up Backup Schedules
Keep your code safe and sound with Cloudback’s automated daily backups. By default, Cloudback backs up your repository and its metadata daily at a specific time, based on your chosen time zone. To ensure your data is backed up regularly and automatically, Cloudback allows you to create and manage backup schedules.
Here’s how you can set up a schedule:
1. Setting Your Timezone
Your backup schedule follows the time zone you set initially. To verify or change it, go to the Account Settings menu. Make sure your backups happen at the right time for you!
2. Navigating to the Schedules Section
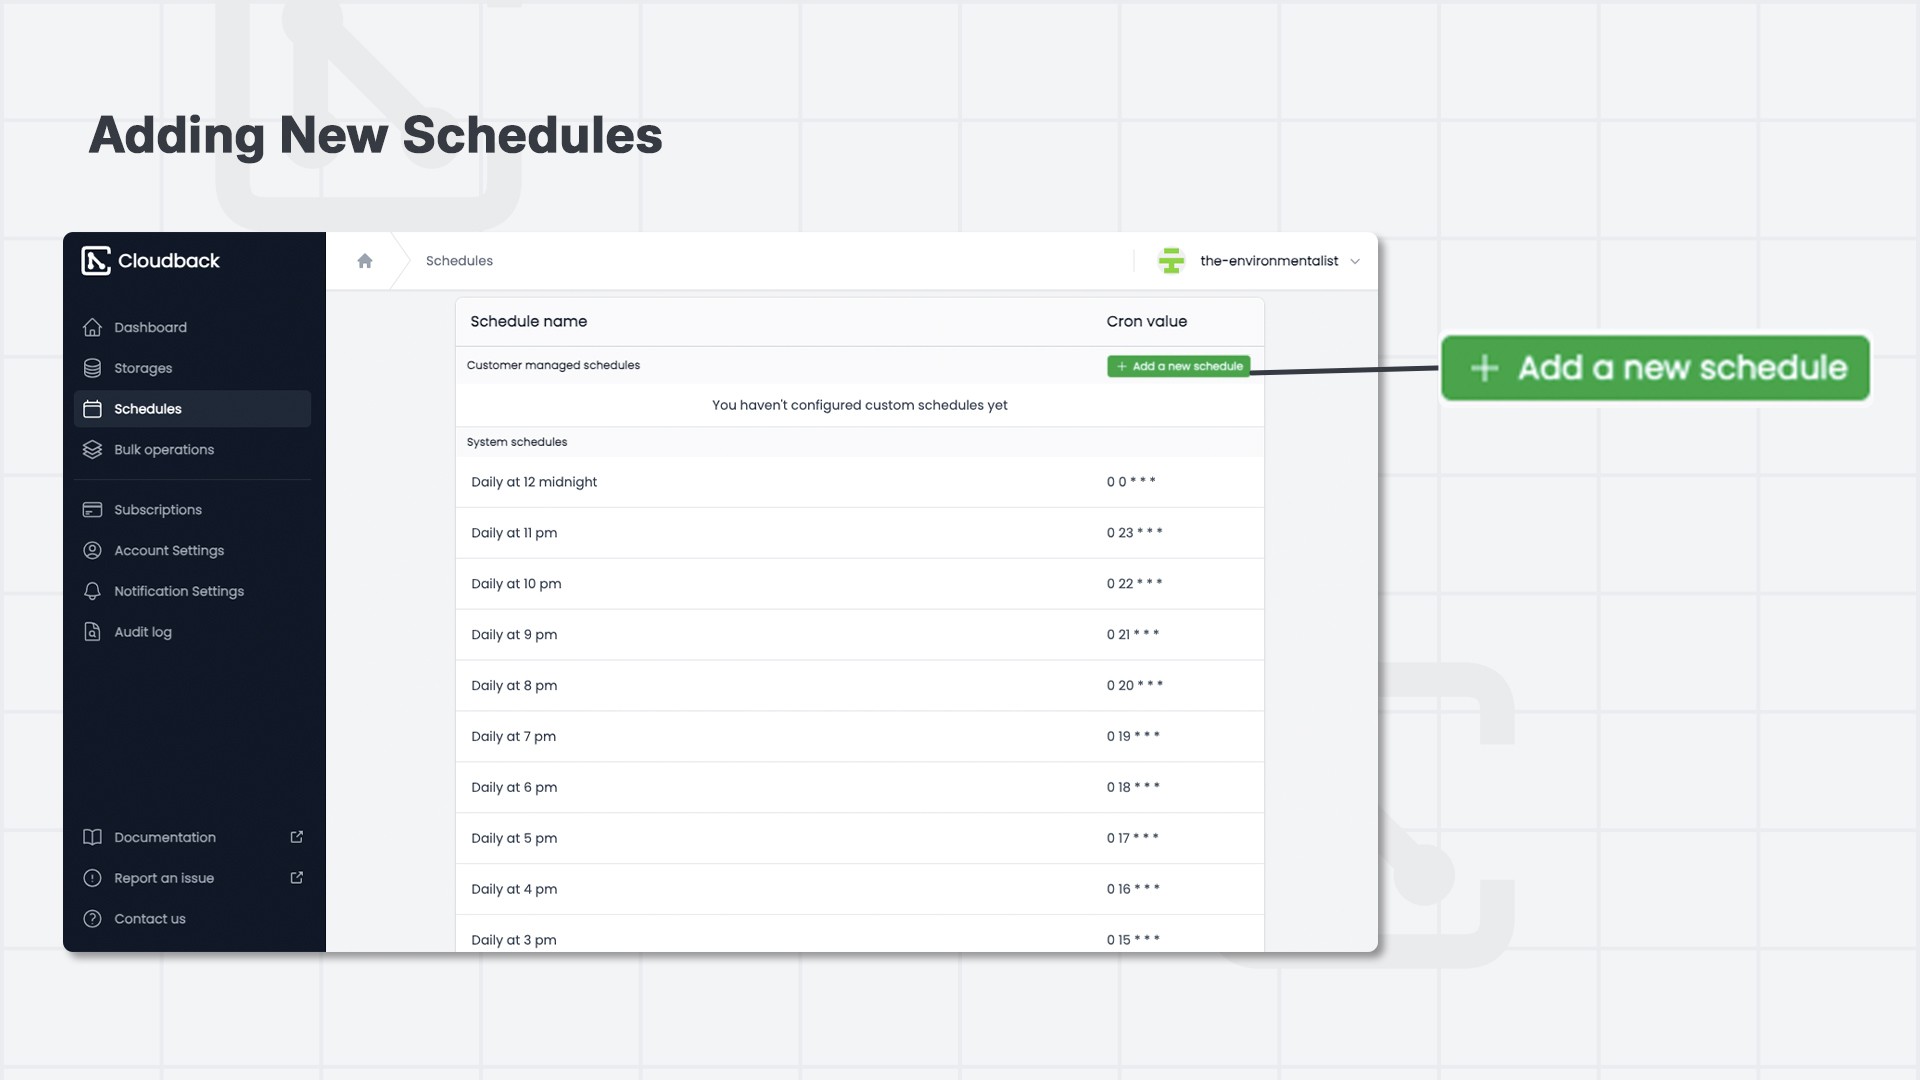
On the Cloudback Dashboard, click on “Schedules” in the left-hand menu. This will take you to the schedules management screen where you can see existing schedules or create new ones.
The screen displays any System Schedules and allows you to configure custom schedules.
3. Creating a New Schedule
Click on the “Add a new schedule” button to create a custom backup schedule.
Schedule Name: Enter a descriptive name for the schedule.
Cron Expression: The schedule is set using a cron expression. You can customize the timing based on hours, days, or months.
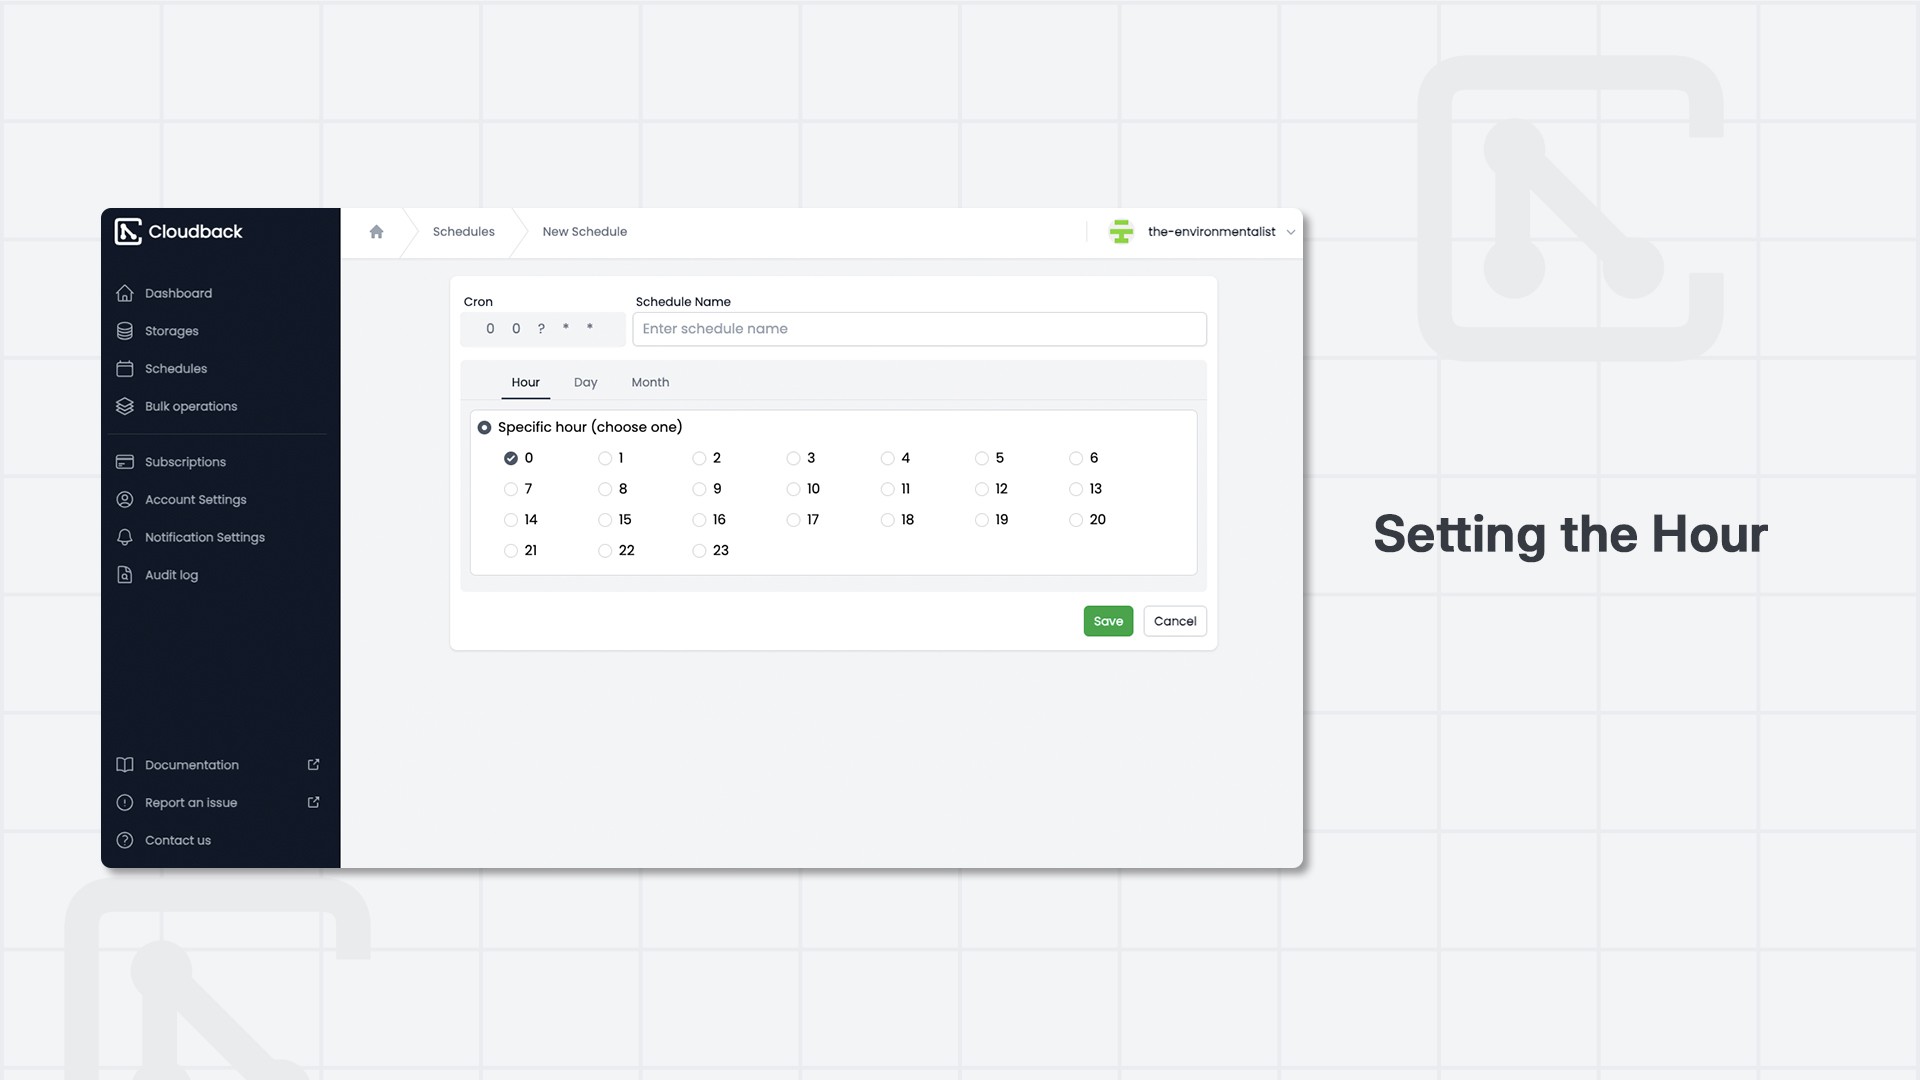
4. Setting the Hour, Day, and Month
Hour: You can specify a particular hour when the backup should run. Choose from the available options, which include hours from 0 to 23 to signify the time. For instance, 0 is midnight, 7 is 7 AM, 14 is 2 PM, 19 is 7 PM, and so on. Pick a time that fits your needs.
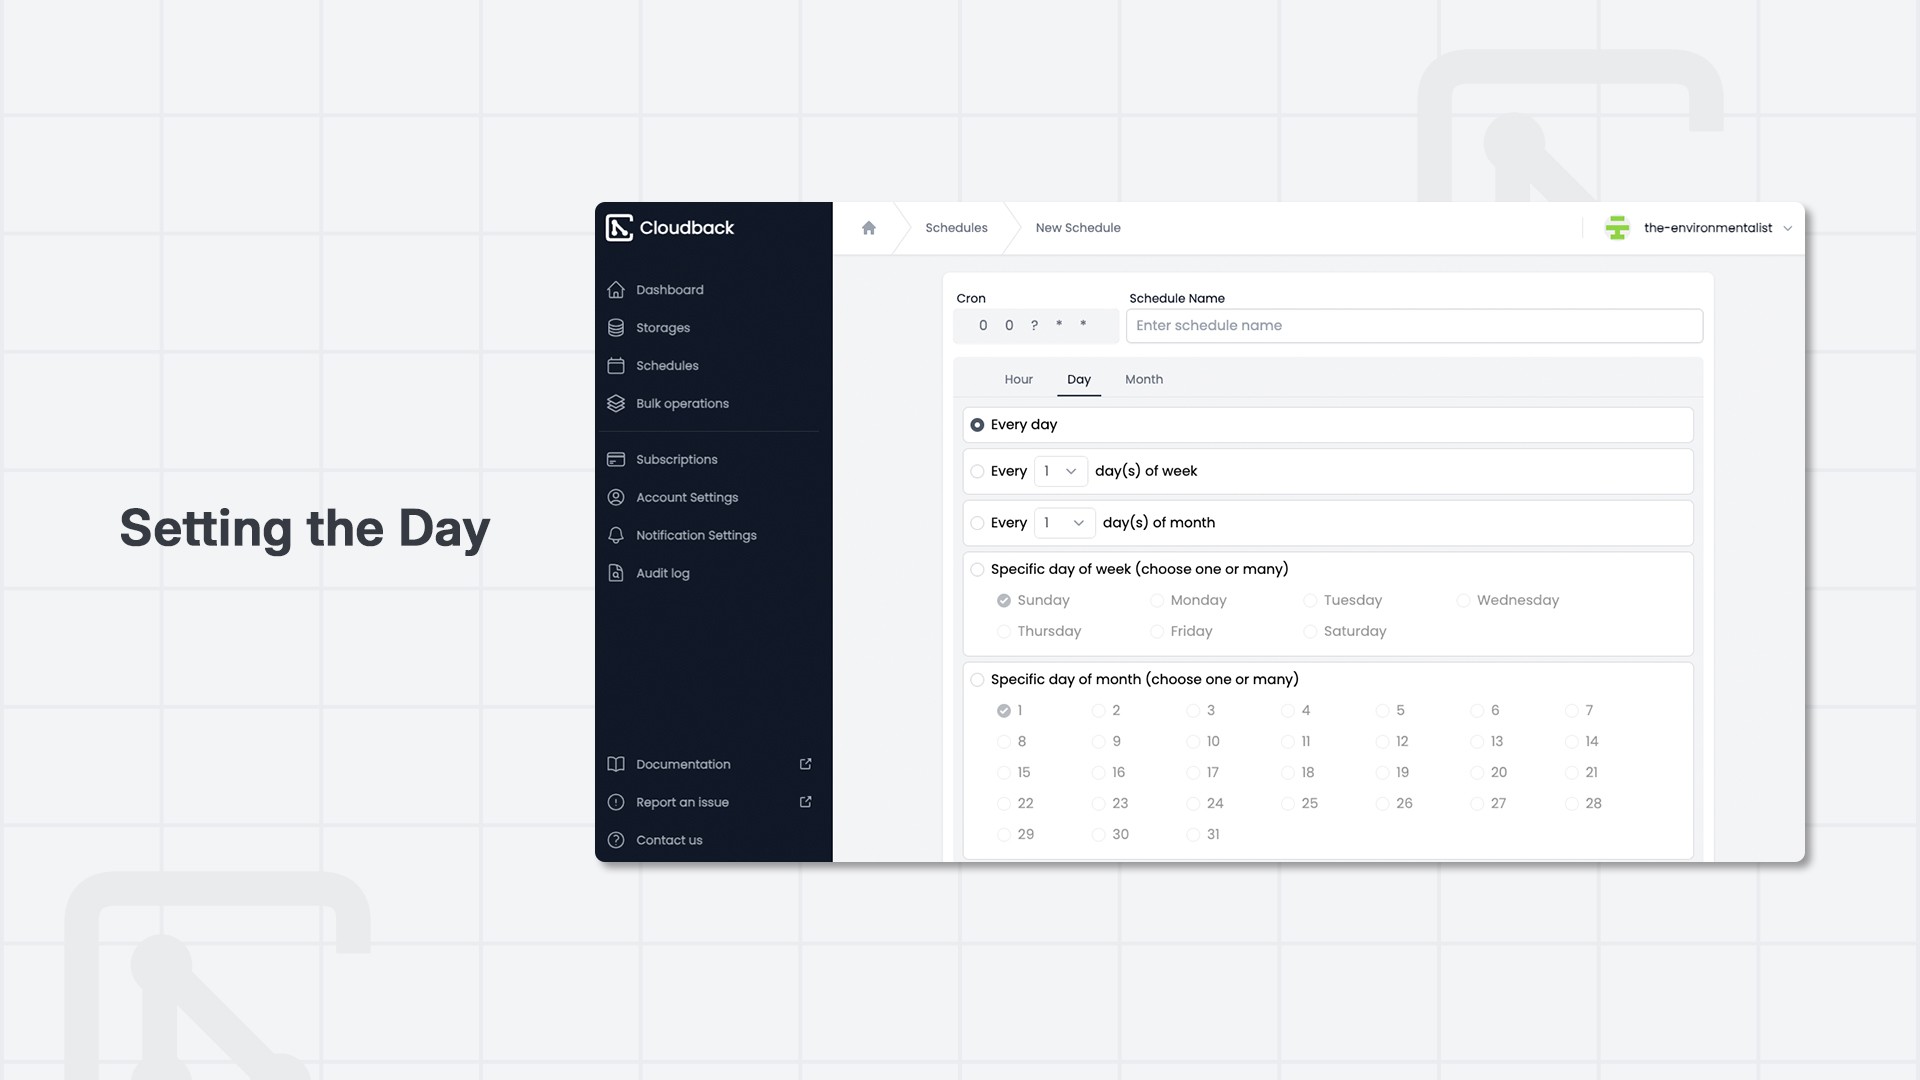
Day: Specify the day of the week or day of the month when the backup should occur. You can set it to run every day or choose specific days, like Sundays, or the 1st of every month.
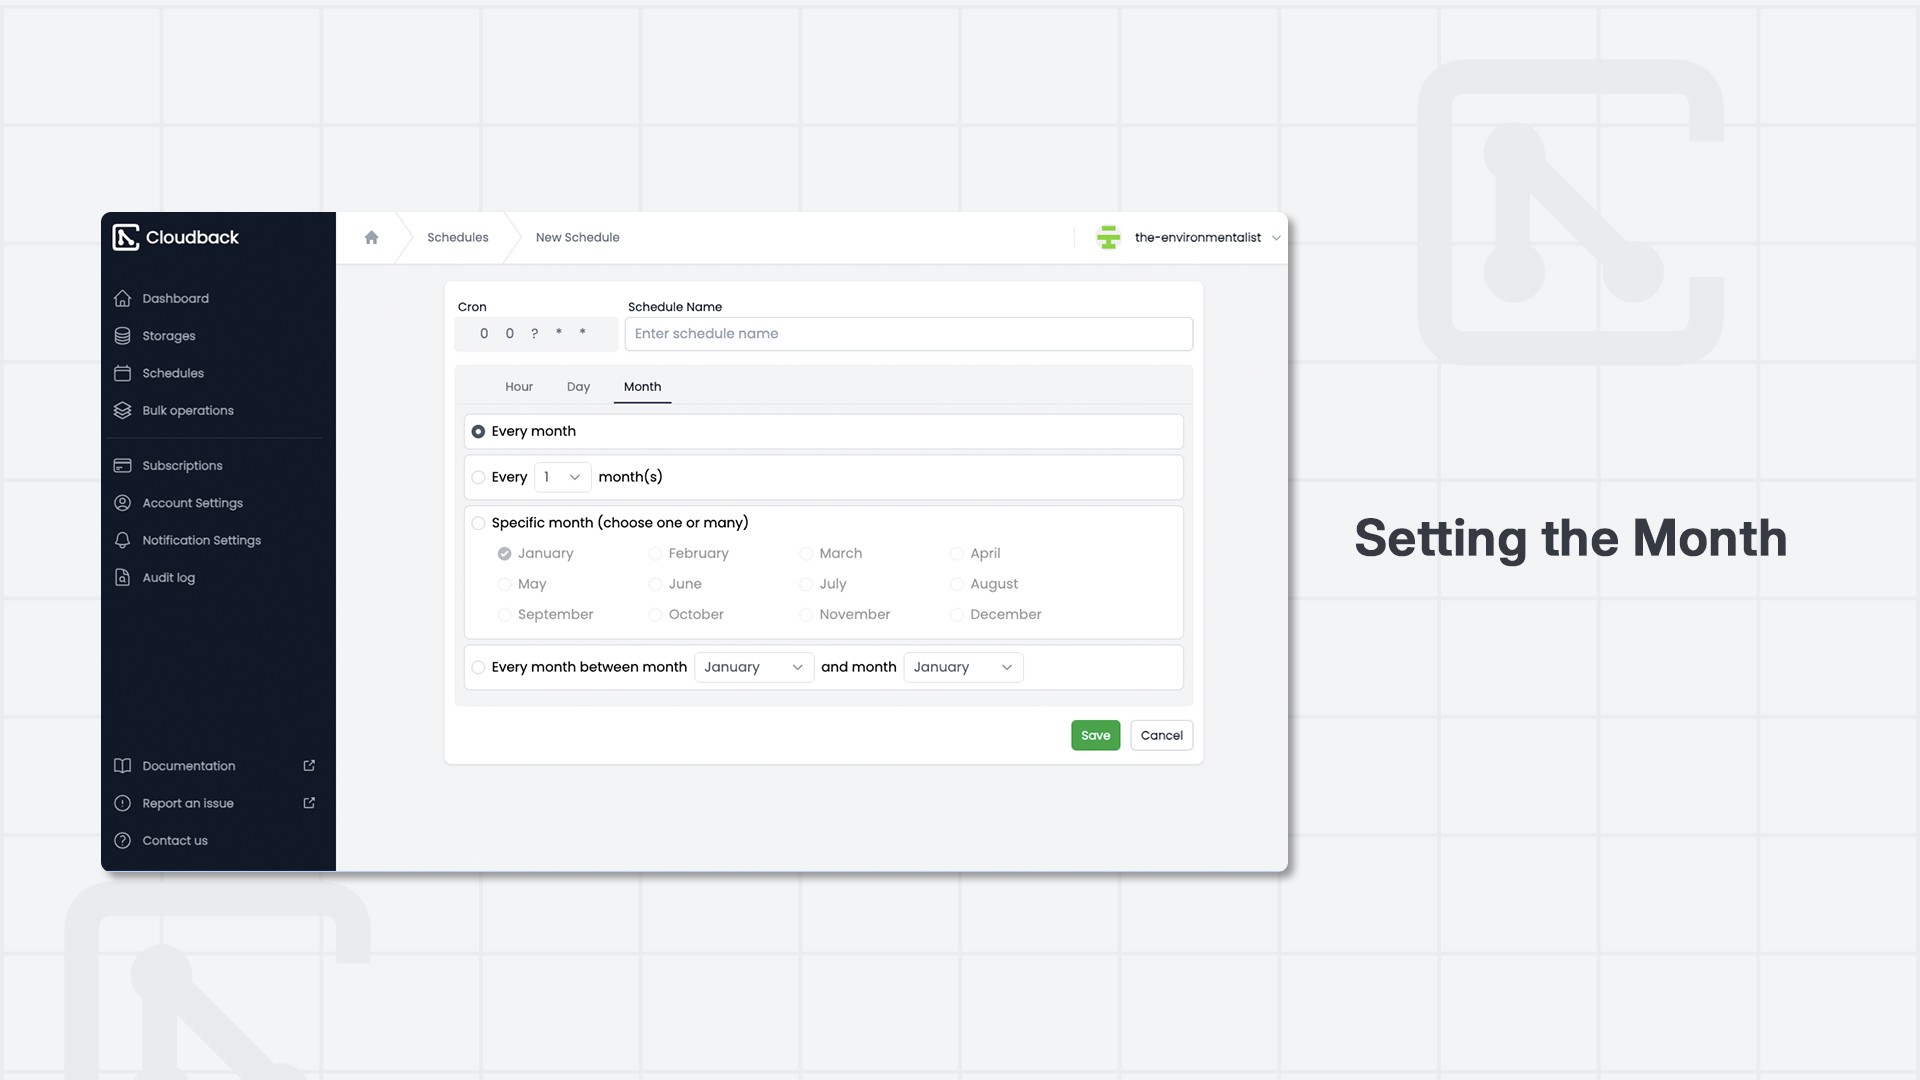
Month: If you want the backup to run monthly, you can choose specific months or set it to run every month.
5. Saving the Schedule
After configuring the hour, day, and month, click “Save” to store your schedule.
The saved schedule will appear in the Schedules list with its associated cron value, indicating the specific times when the backup will occur. Your backup schedule is now set and ready to go!
With these settings, your backups will be performed automatically according to the schedule you’ve defined, ensuring your data is consistently backed up without manual intervention.
Bulk Operations
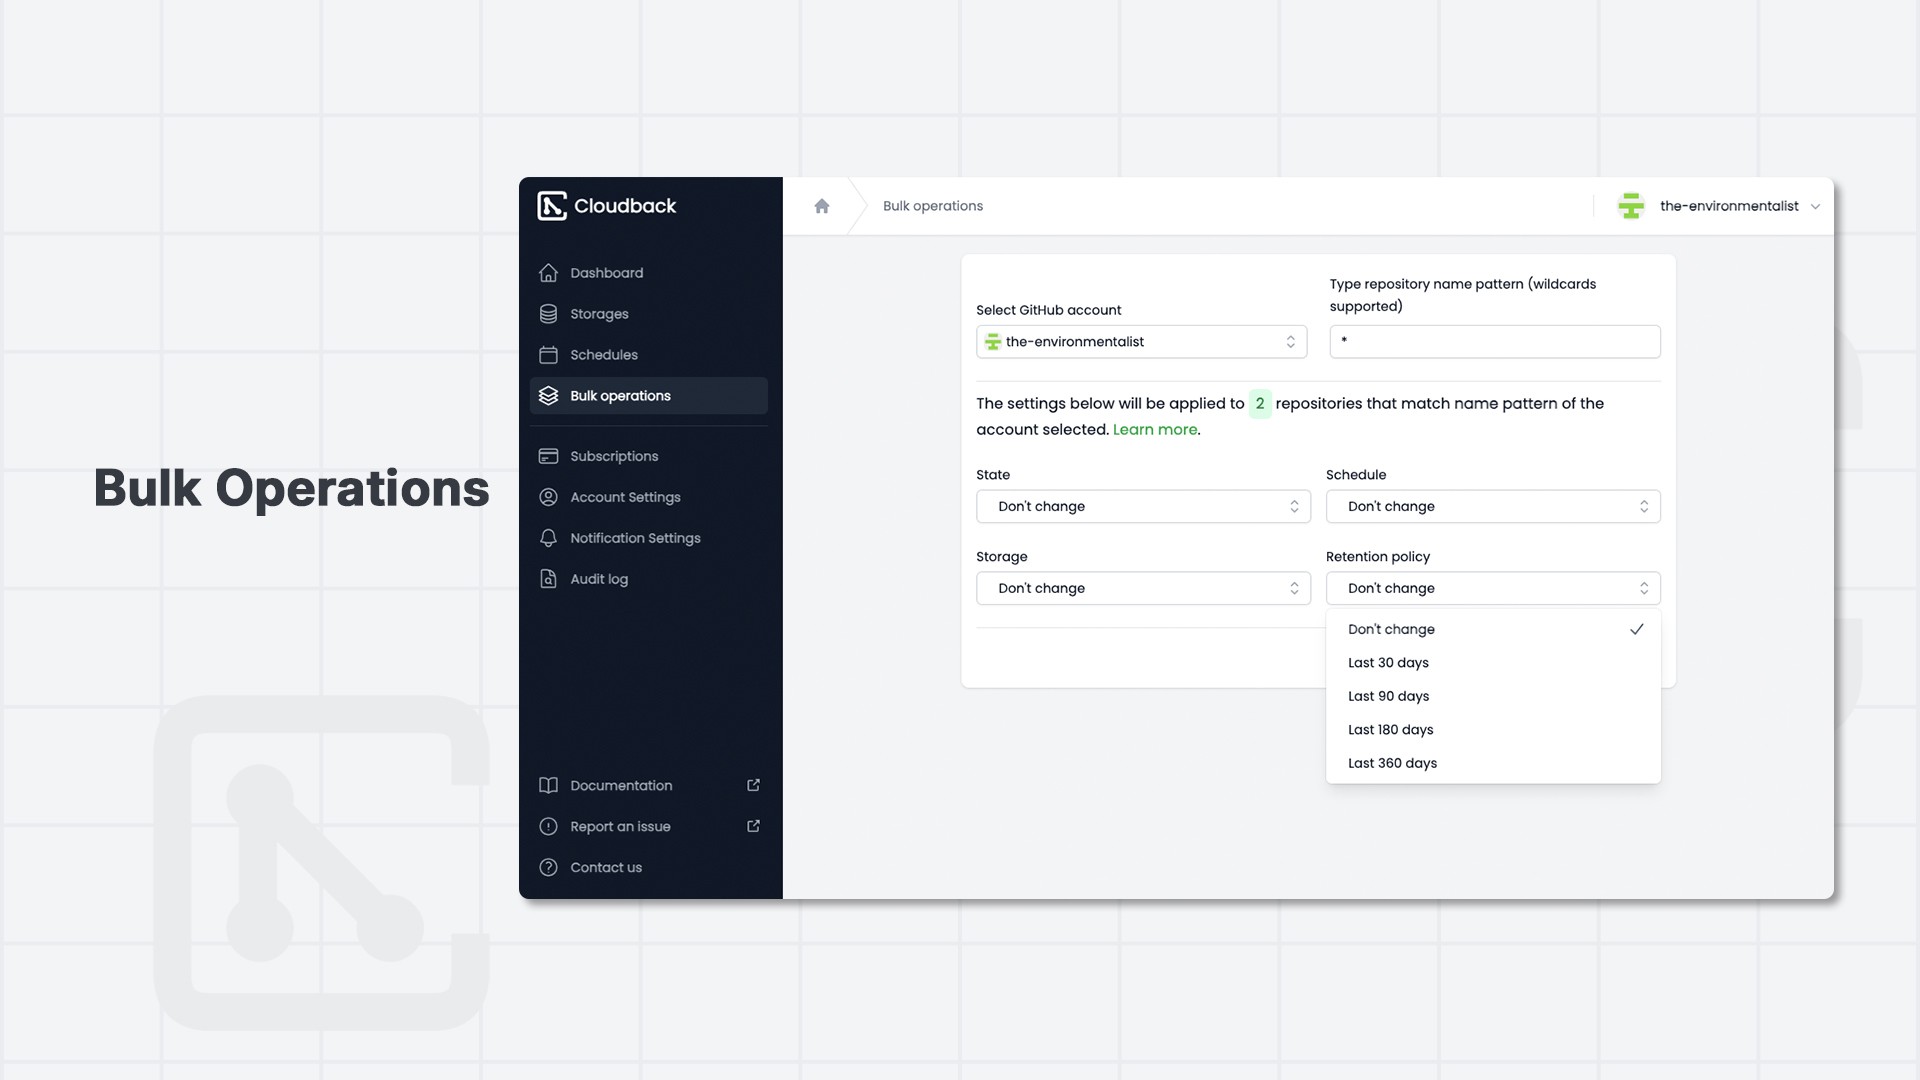
The Bulk Operations feature in Cloudback allows you to efficiently manage multiple repositories at once, applying the same settings across a group of repositories without having to configure them individually. This is particularly useful if you’re juggling several repositories that require consistent backup settings.
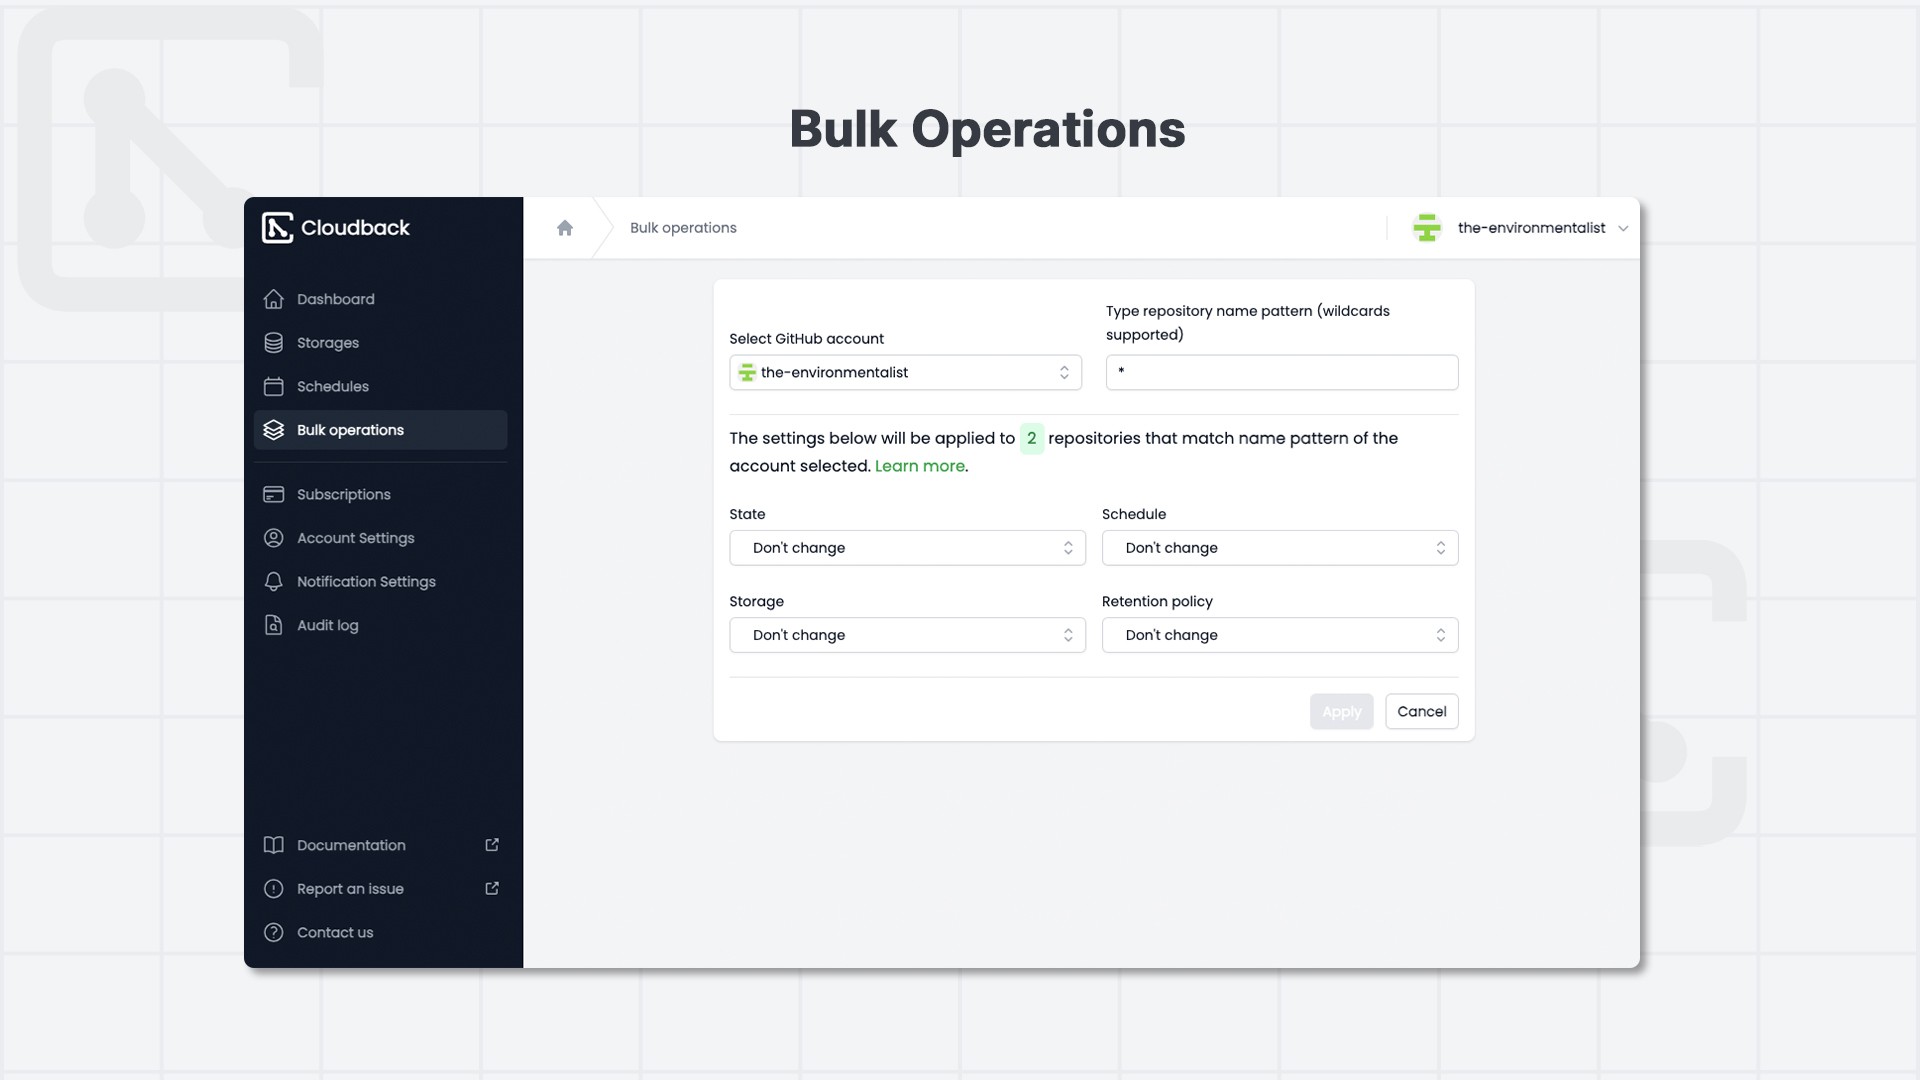
Here are the steps to perform Bulk Operations:
1. Select GitHub Account
In the Bulk Operations section, begin by selecting the GitHub account associated with the repositories you want to manage from the dropdown menu.
2. Repository Name Pattern
You can filter which repositories to apply the bulk operation to by specifying a name pattern. Repository name pattern accepts wildcard characters and a comma character to join multiple queries.
Wildcard characters:
*zero or more characters?exactly one character,specify multiple queries separated by a comma
3. Adjusting Settings for Multiple Repositories
State: Choose whether the selected repositories should be scheduled or not scheduled for backups. You can also leave this setting unchanged if no changes are needed.
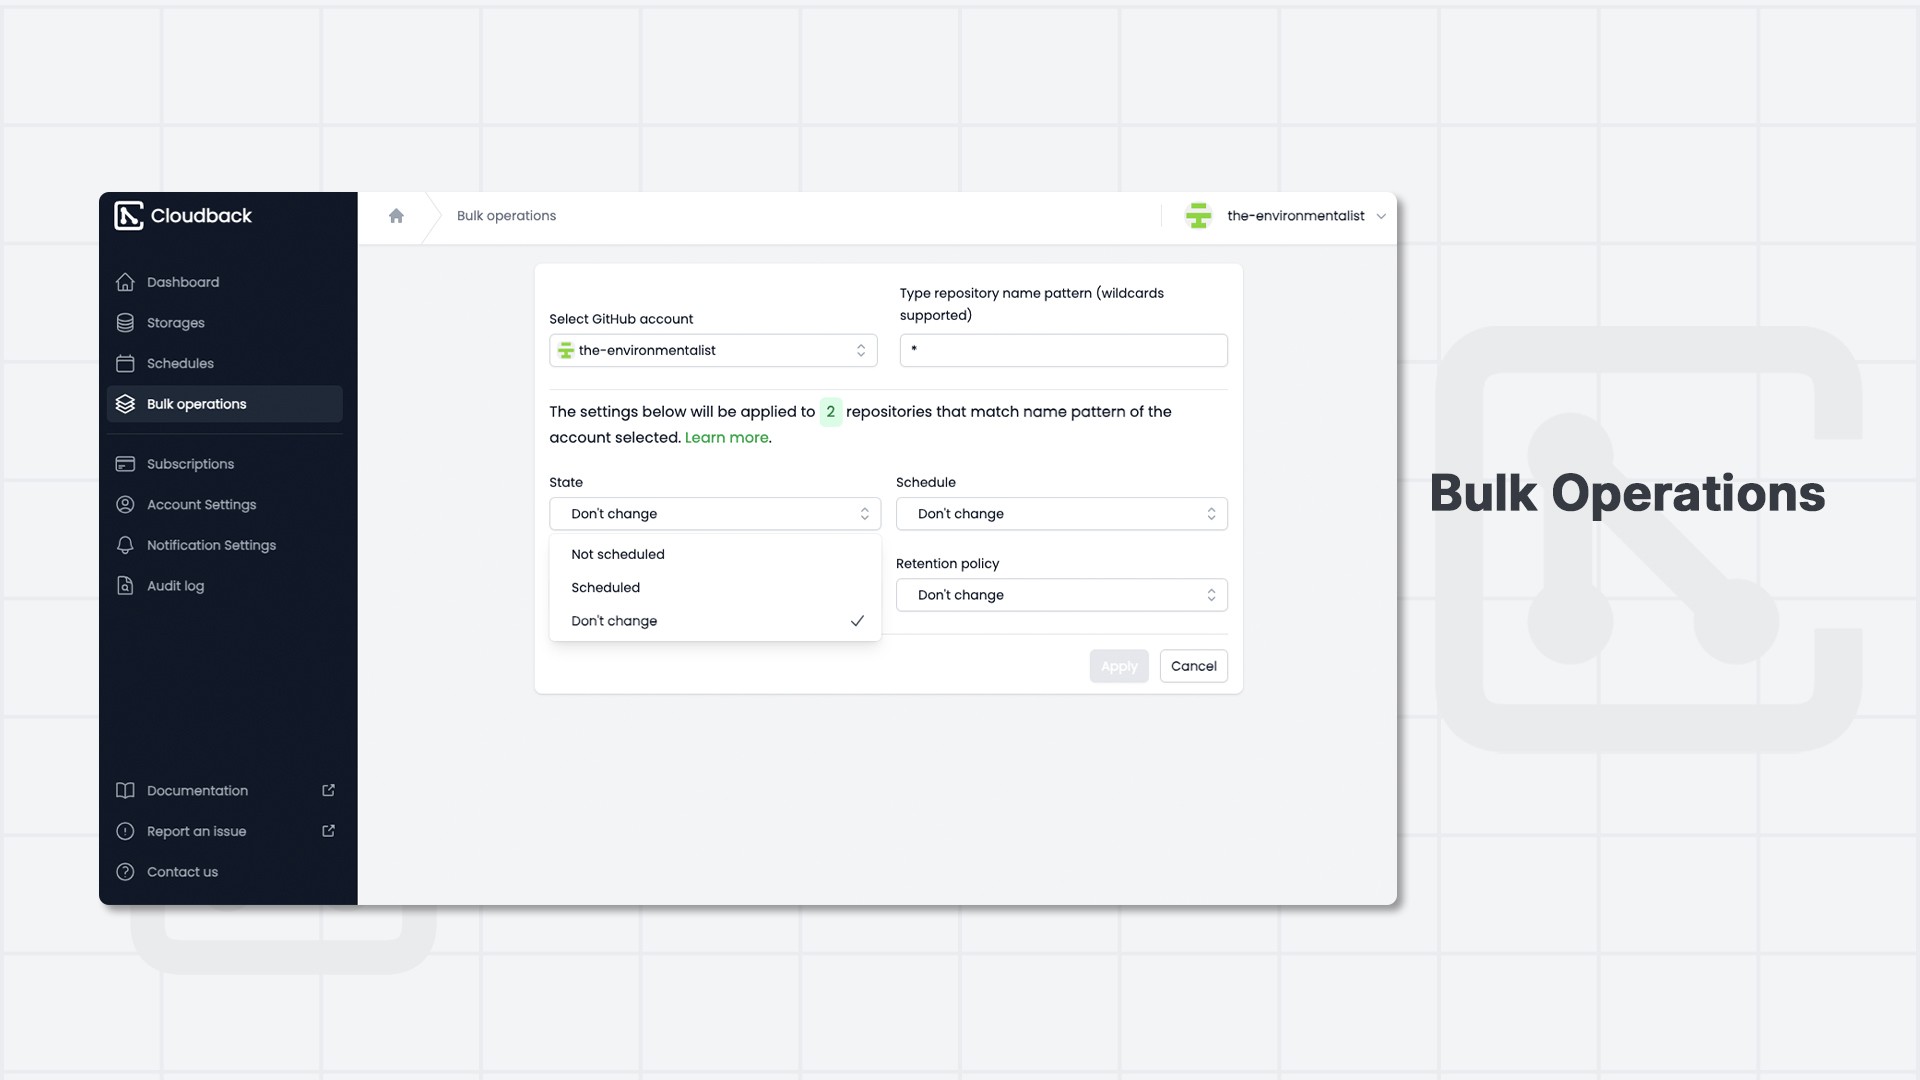
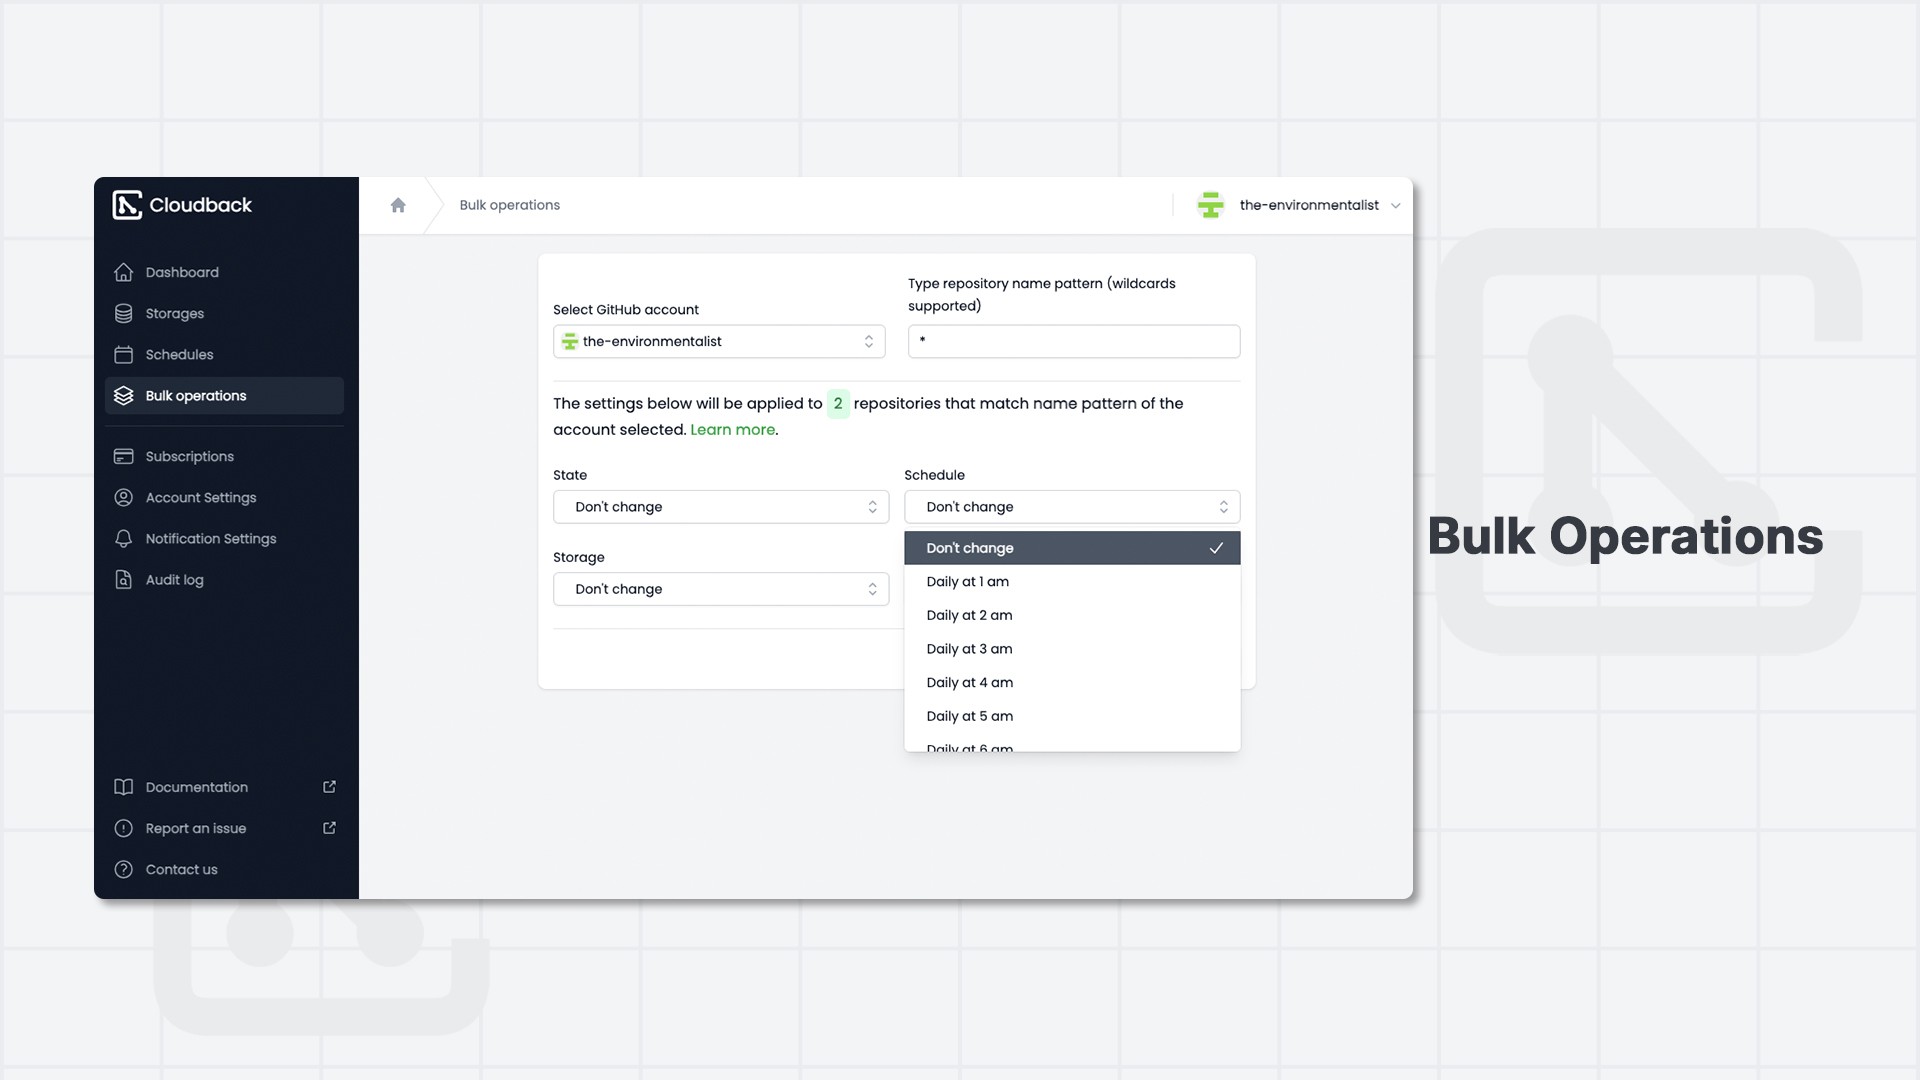
Schedule: Set or change the backup schedule for the selected repositories. Options range from daily backups at specific hours to no changes at all.
Storage: Select the storage location for backups. You can switch between different storage options like Cloudback US, Cloudback EU, Cloudback UK, and others.
Retention Policy: Adjust the retention policy, which dictates how long backups should be kept before being deleted.
4. Applying Changes
Once you’ve configured all the settings, click “Apply” to implement the changes across all the repositories that match your specified criteria.
The settings you configured will be applied uniformly to the selected repositories, ensuring consistency and saving time.
Note
Number of Scheduled Repositories
Your ability to schedule backups is linked to your GitHub Marketplace Plan and the number of units purchased. Here's how to check your current status:
Purchased: Total number of repositories covered by your plan.
In Use: Number of repositories currently scheduled for backups.
Remaining: Difference between purchased repositories and those in use.
Check your details in the Subscriptions menu to ensure you’re using your plan effectively and stay informed about your backup capacity.
Do you have different needs? Let us know and we’ll see how we can accommodate your requirements!
